
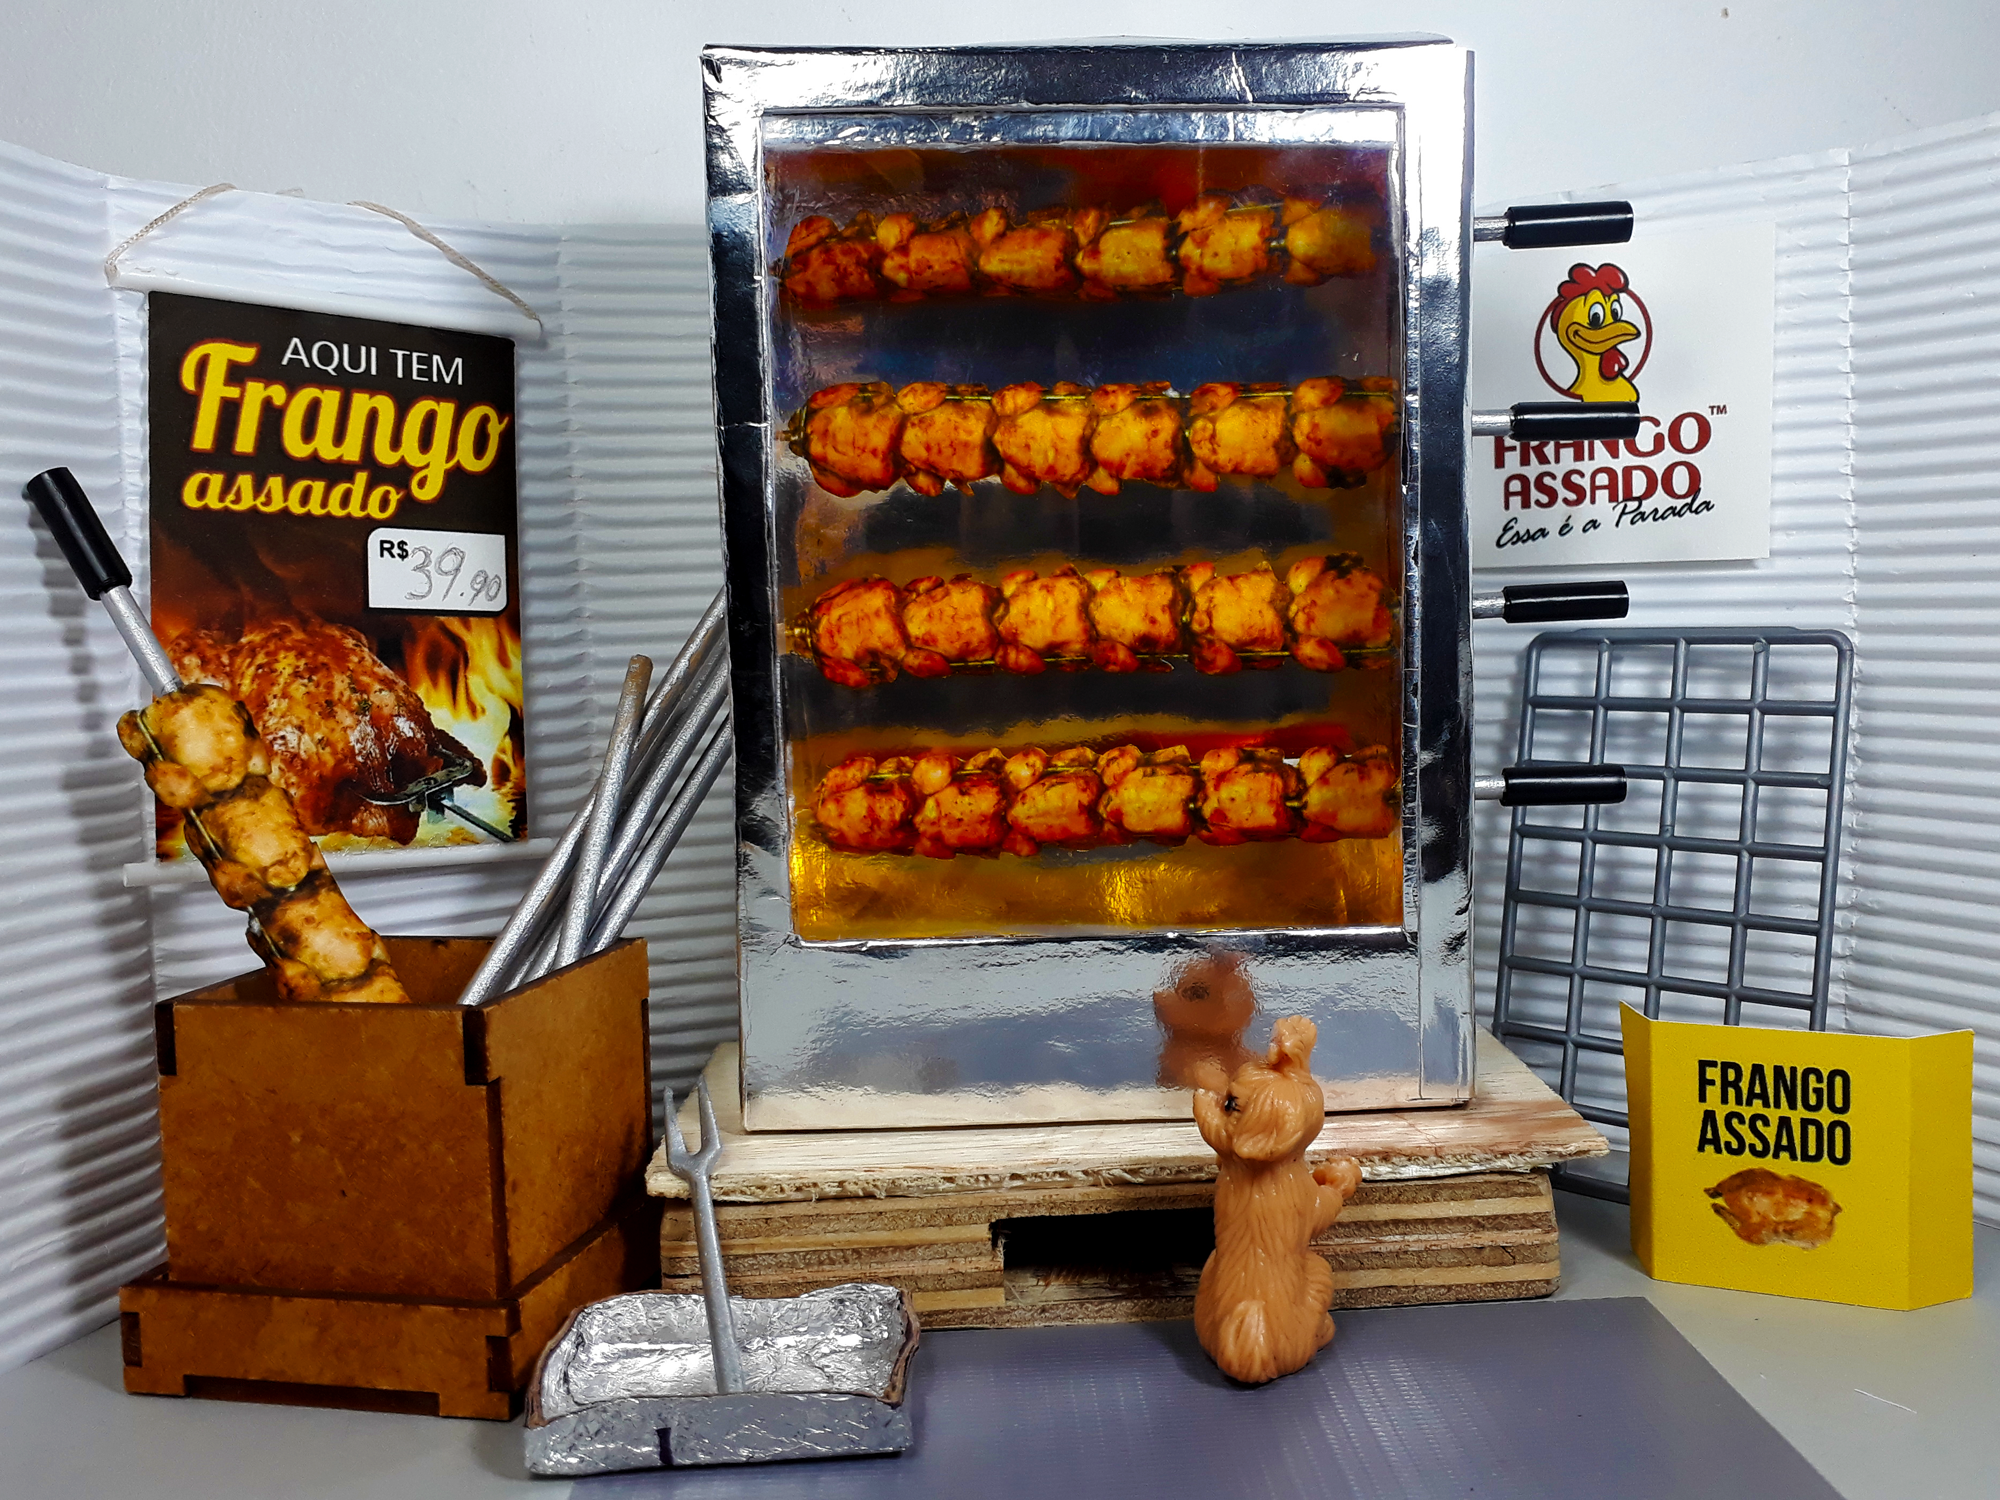
DIY – Assador de Frango
Projeto Baba Baby para o concurso Beast Wars, que foi cancelado pelo Corona Vírus! Mas eu sou tinhoso e segui em frente com a construção do Assador de Frango! Mais um projeto especial que me levou 1 semana entre testes e acabamentos, mas o resultado ficou bem legal!
Quer construir seu Assador de Frango? Segue o Tutorial para deixar qualquer cachorro vira-lata babando de frente para esta televisão de cachorro!
Você vai precisar de:
- Cartolina Laminada Prata
- Cartolina Laminada Dourada
- Papel cartão ou cartão pluma para a estrutura
- Folha de Acetato ou plastico resistente
- Espetos de Churrasco
- Tinta para artesanato Prata
- Fita isolante preta
- Canudo de plástico
- Imãs
- Placa de metal
- Cola quente
- Super cola
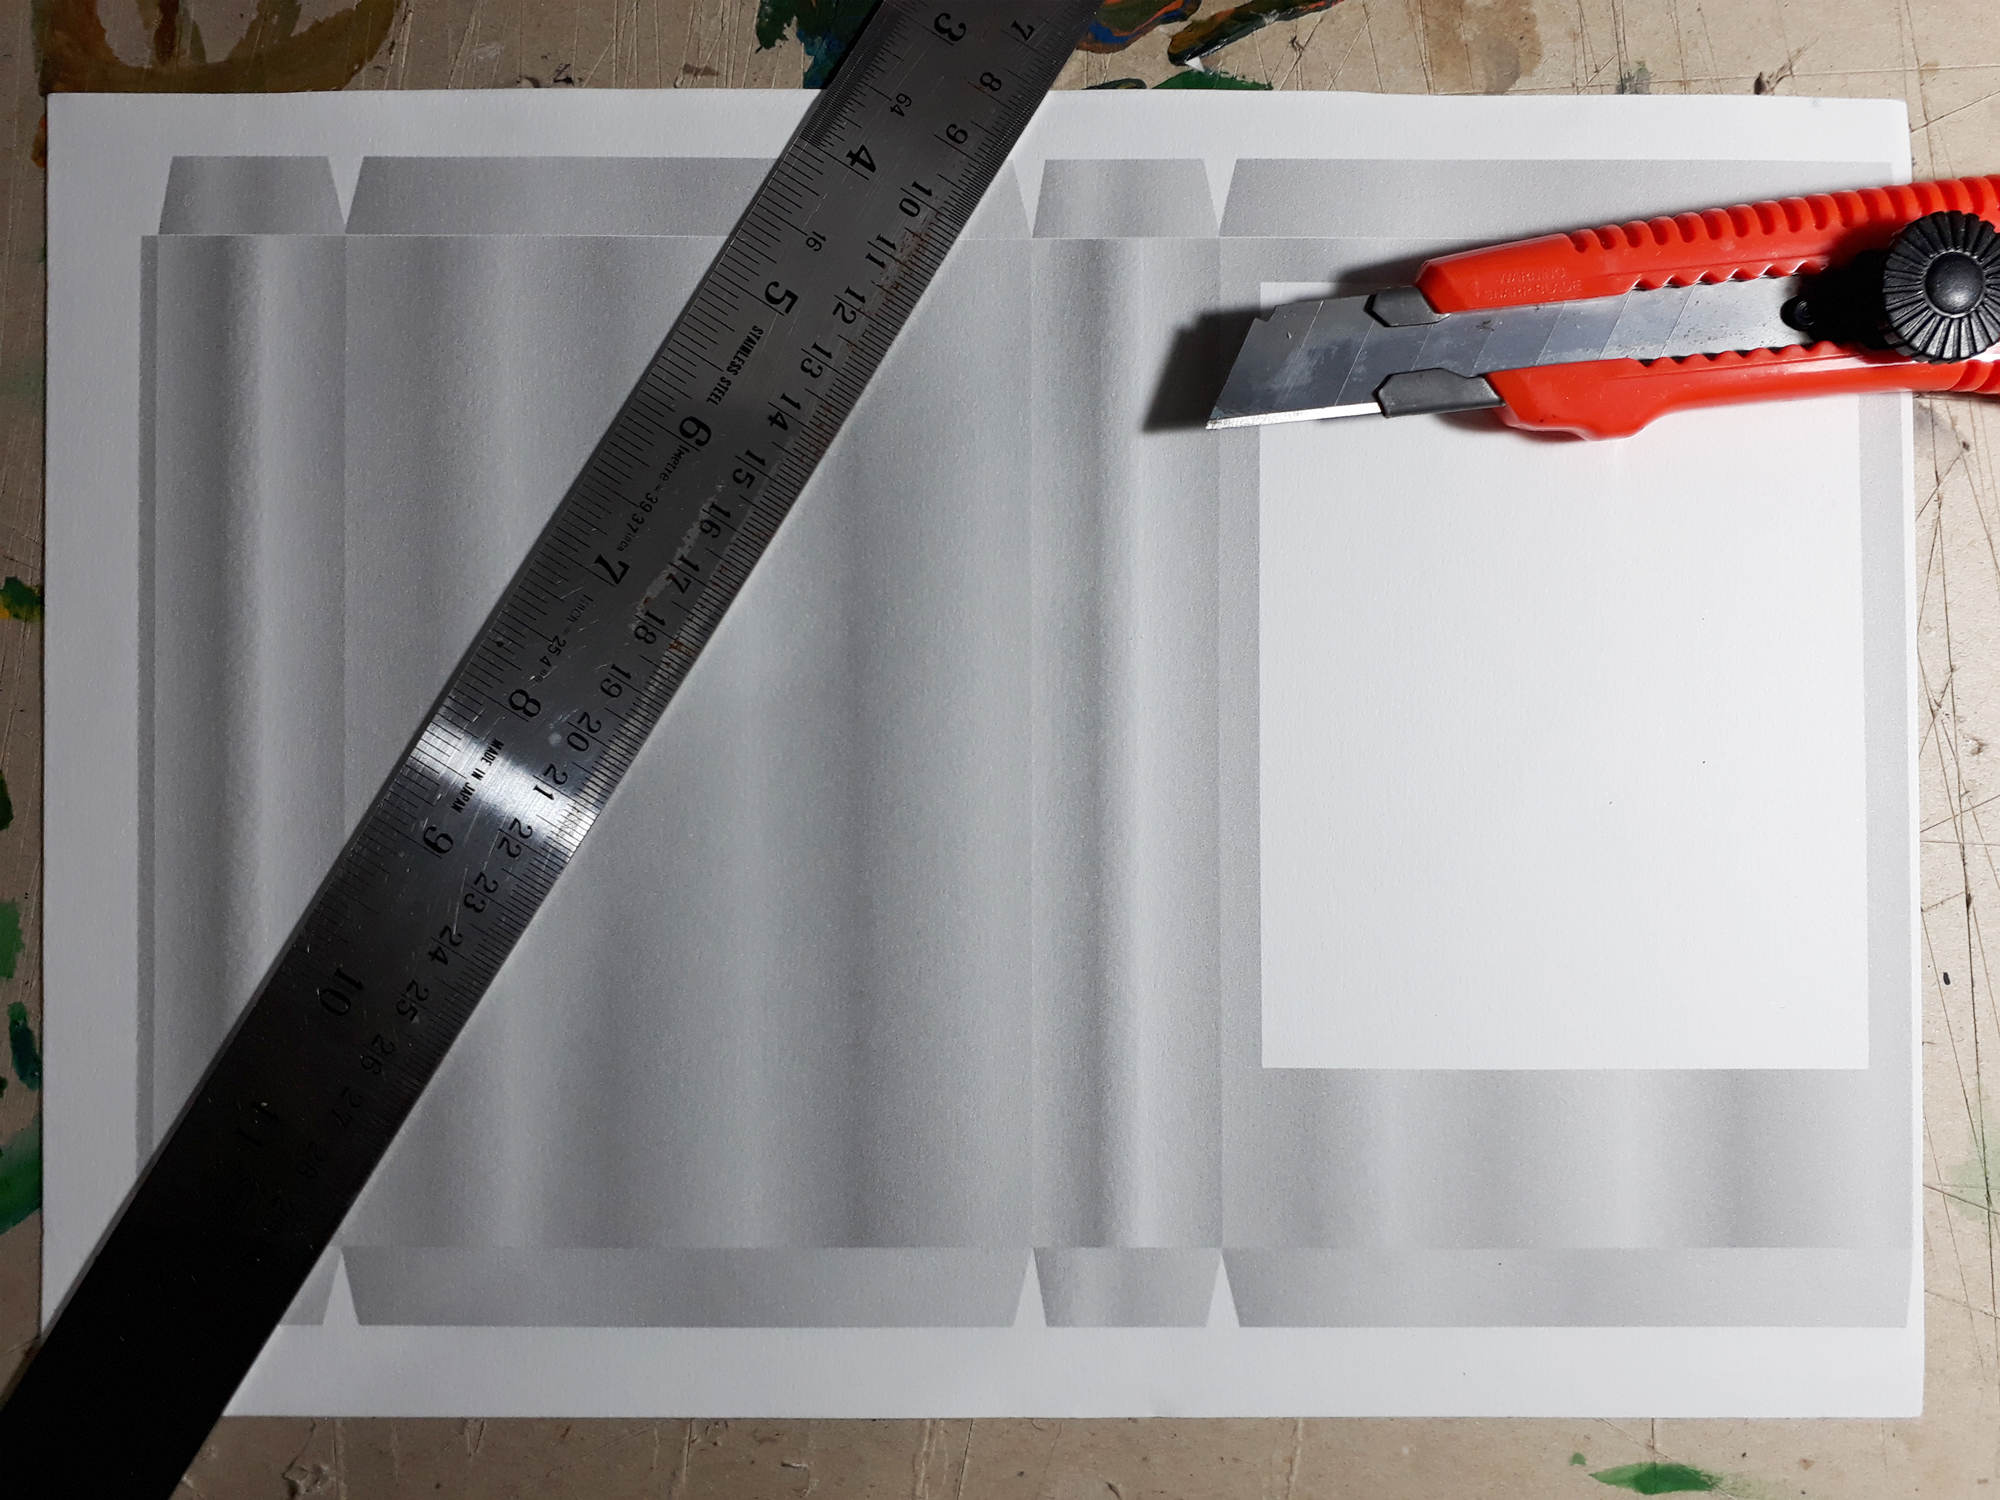
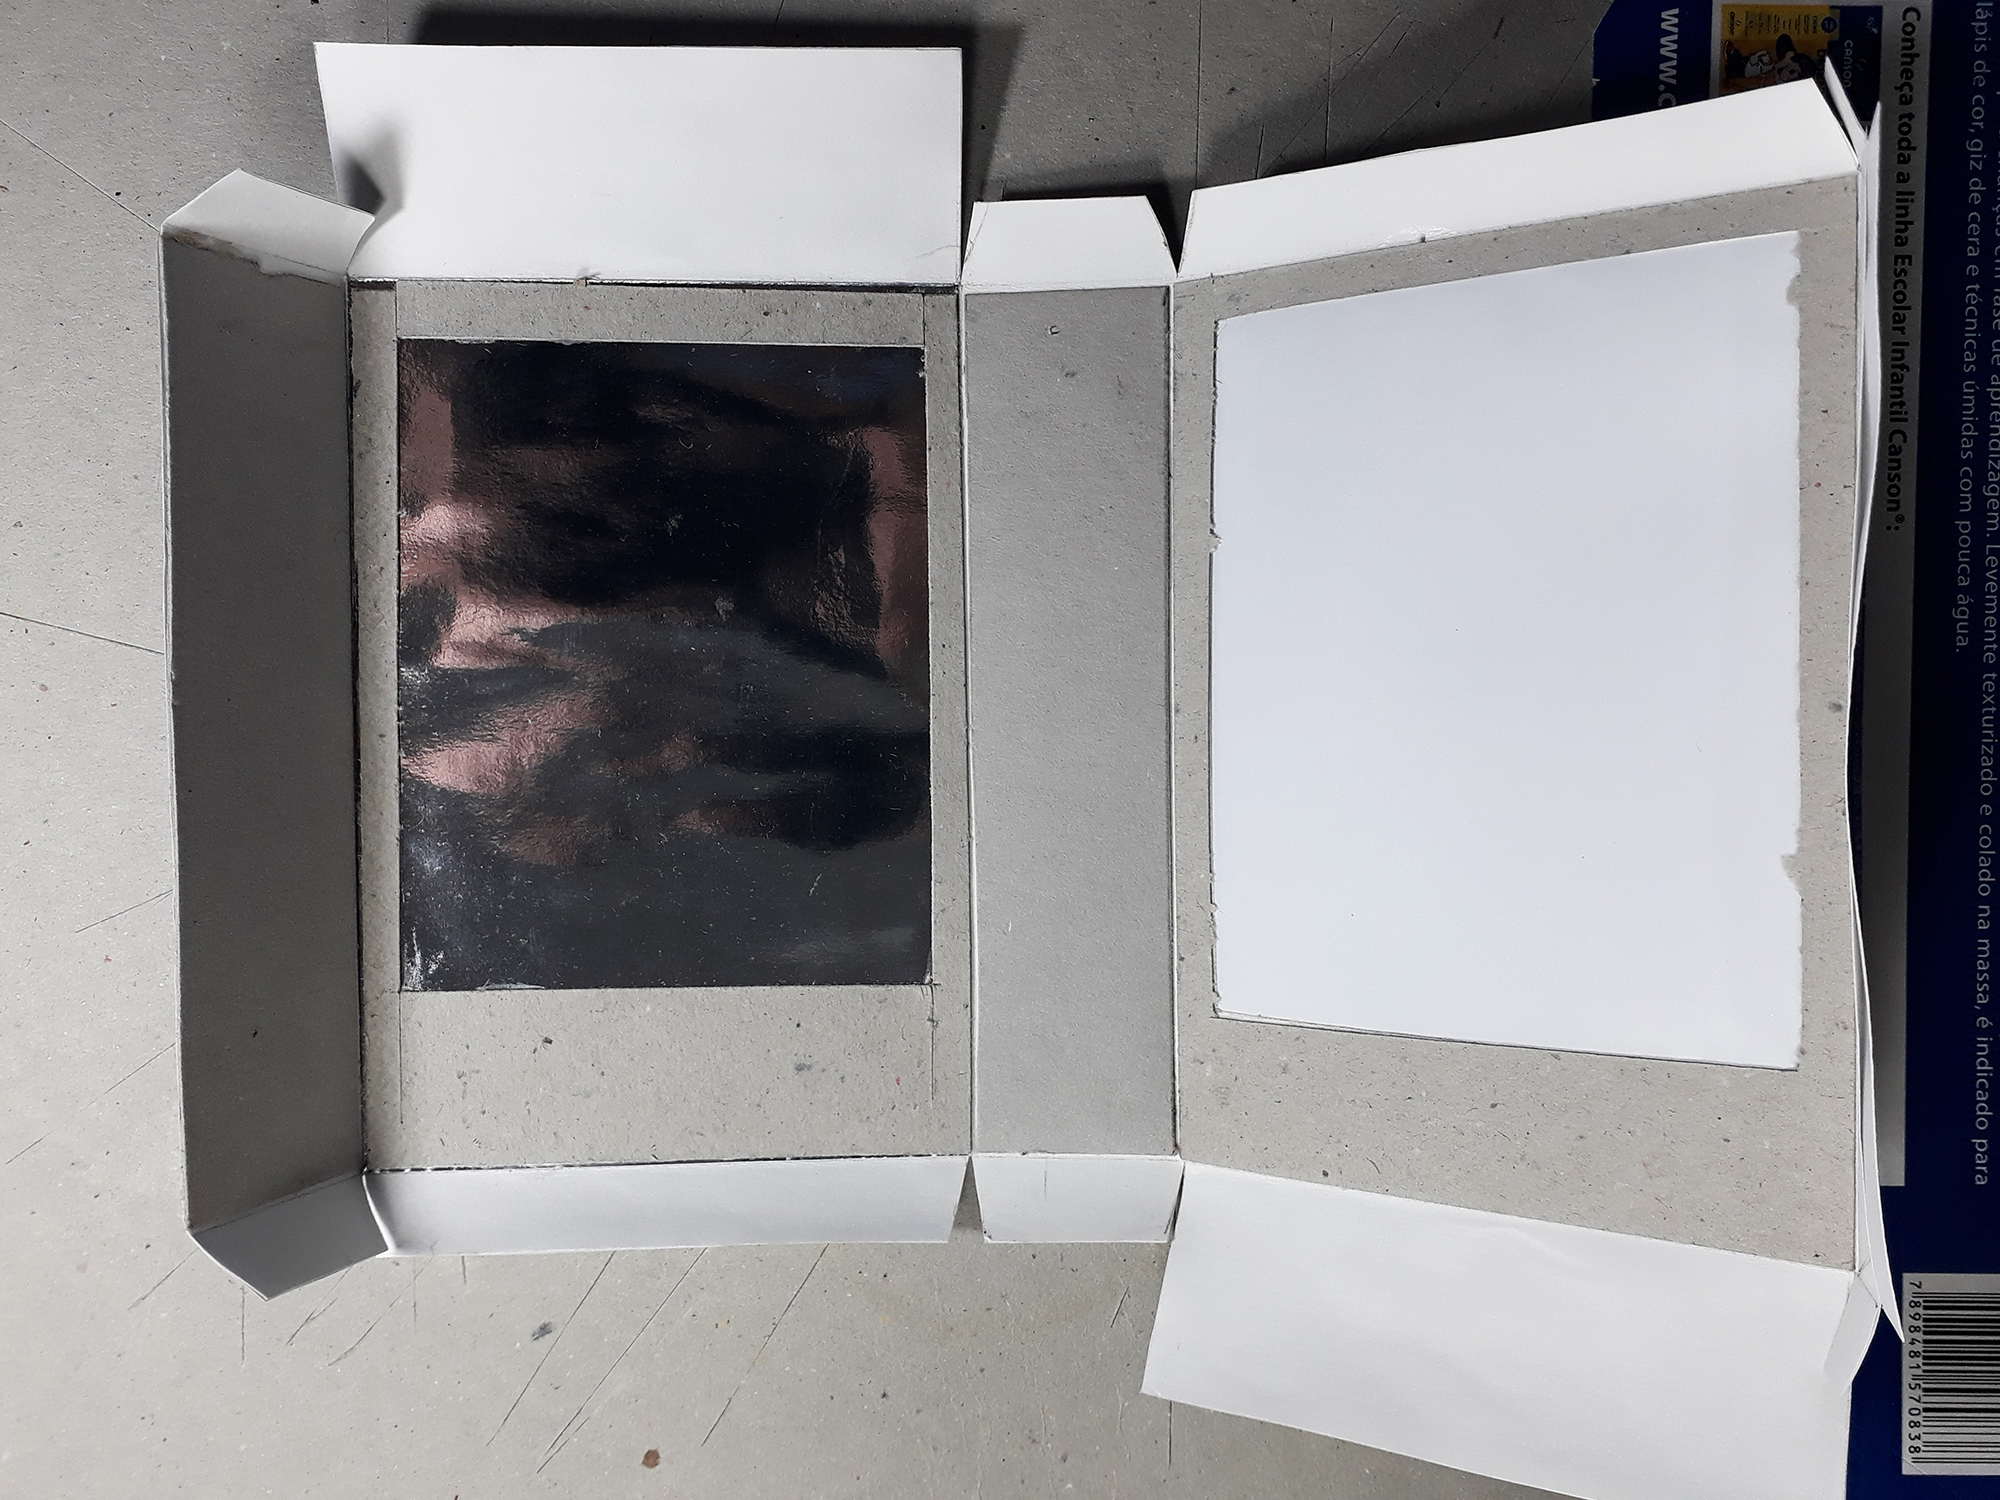
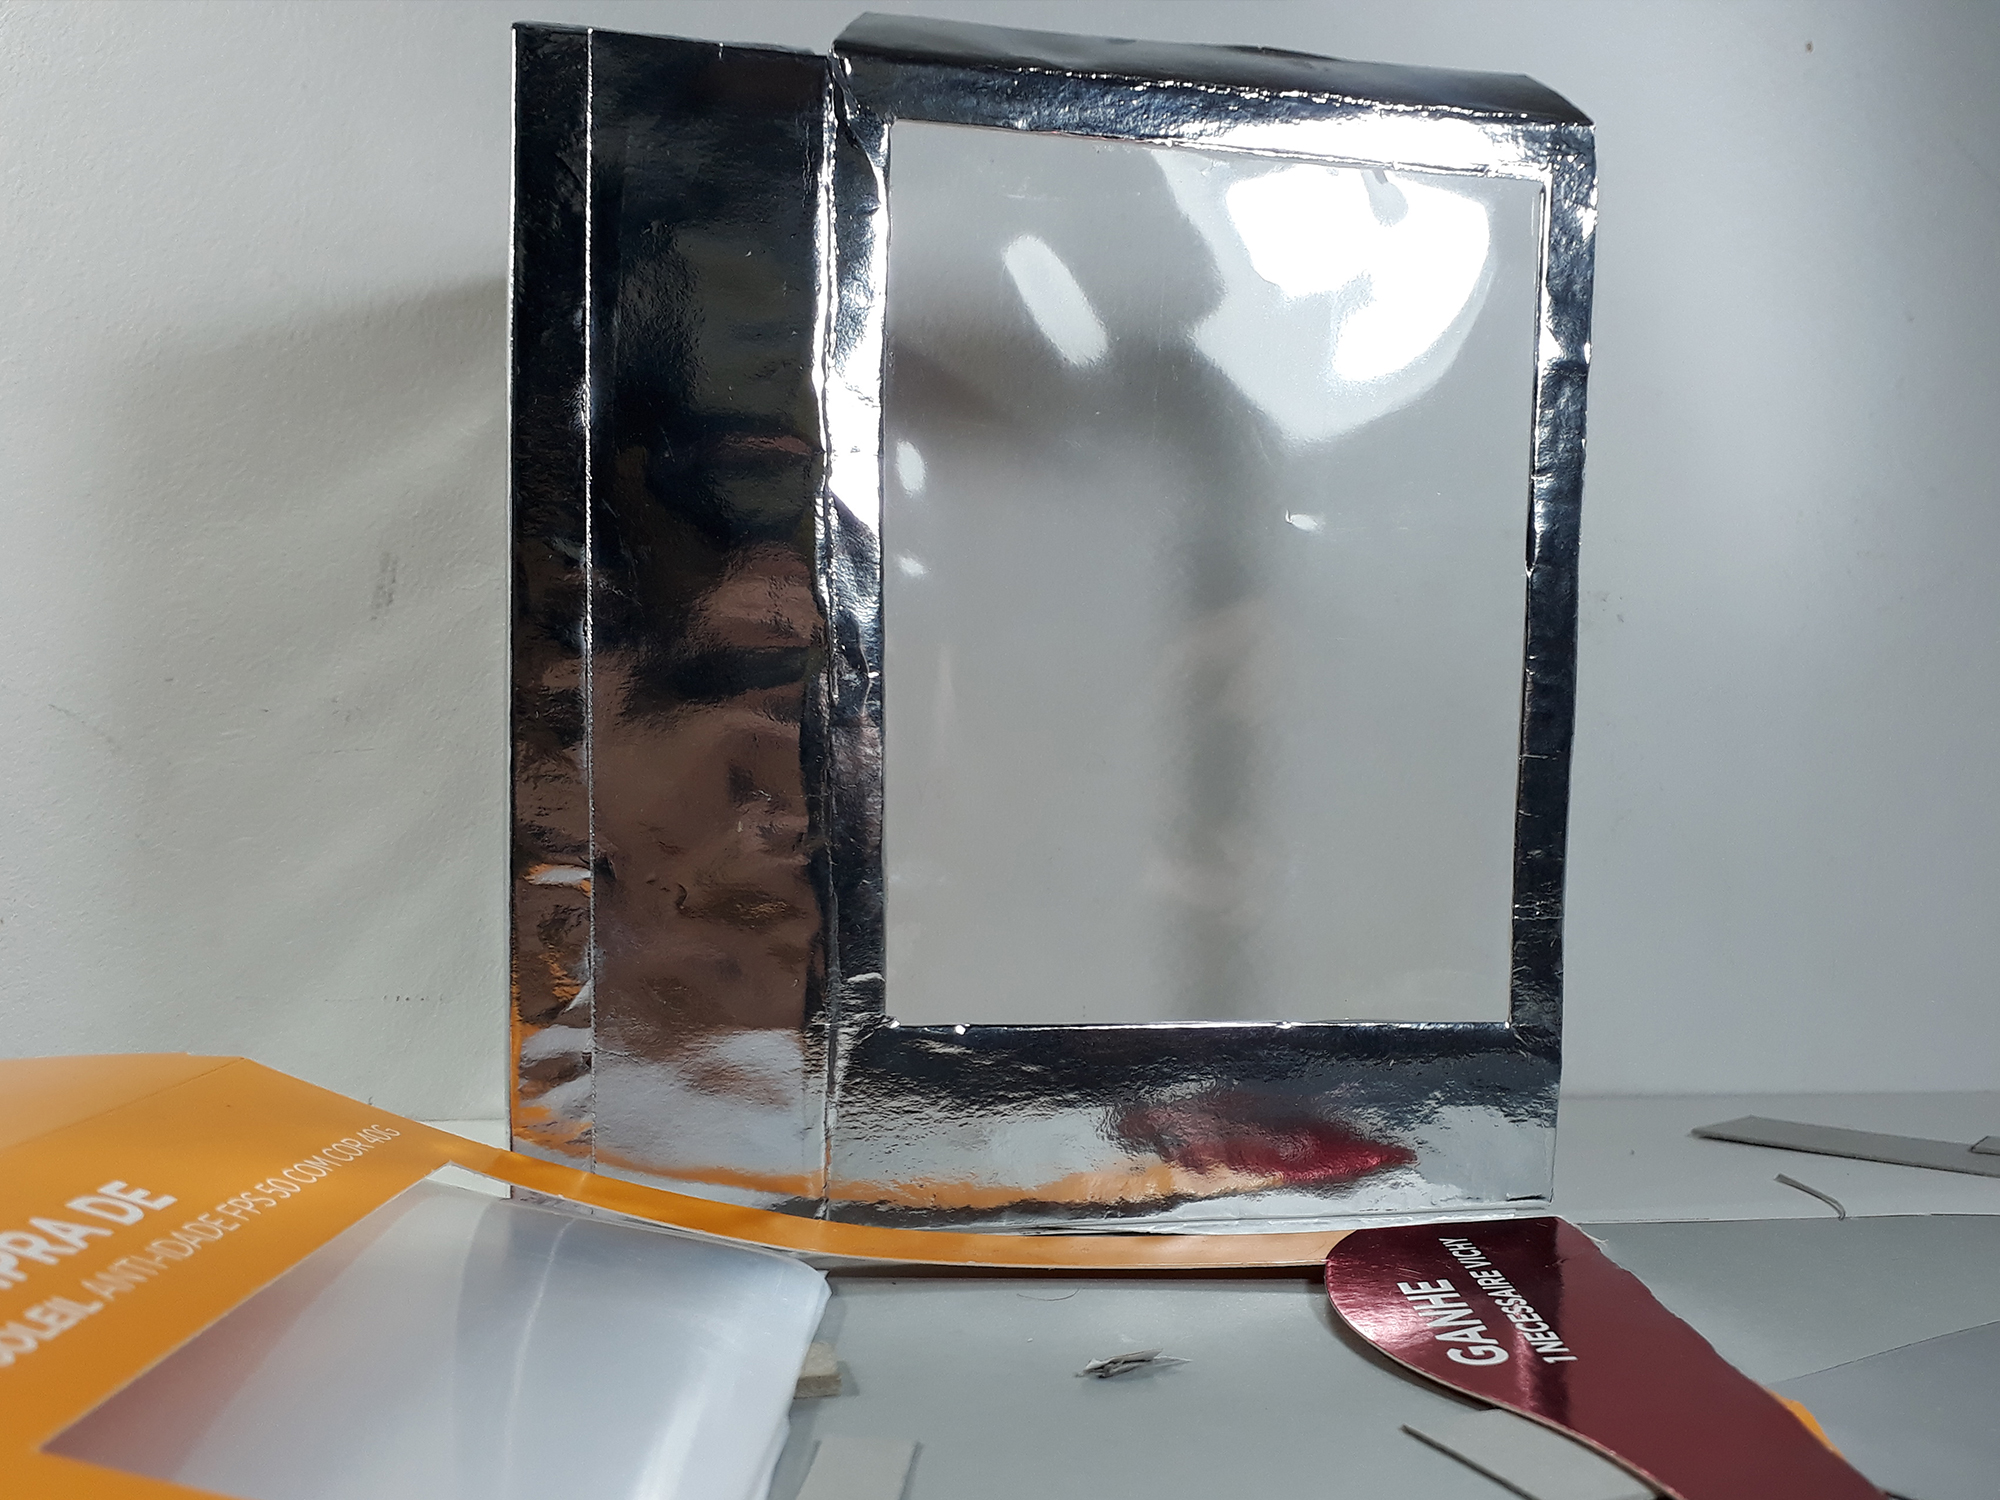
1) Vamos começar com o desenho do projeto! Depois de alguns testes fechei o tamanho para a escala 1:12 em 11x16x3,5 (LAP). Planificando na cartolina metalizada a estrutura já pensando nos fechamentos e na vitrine.
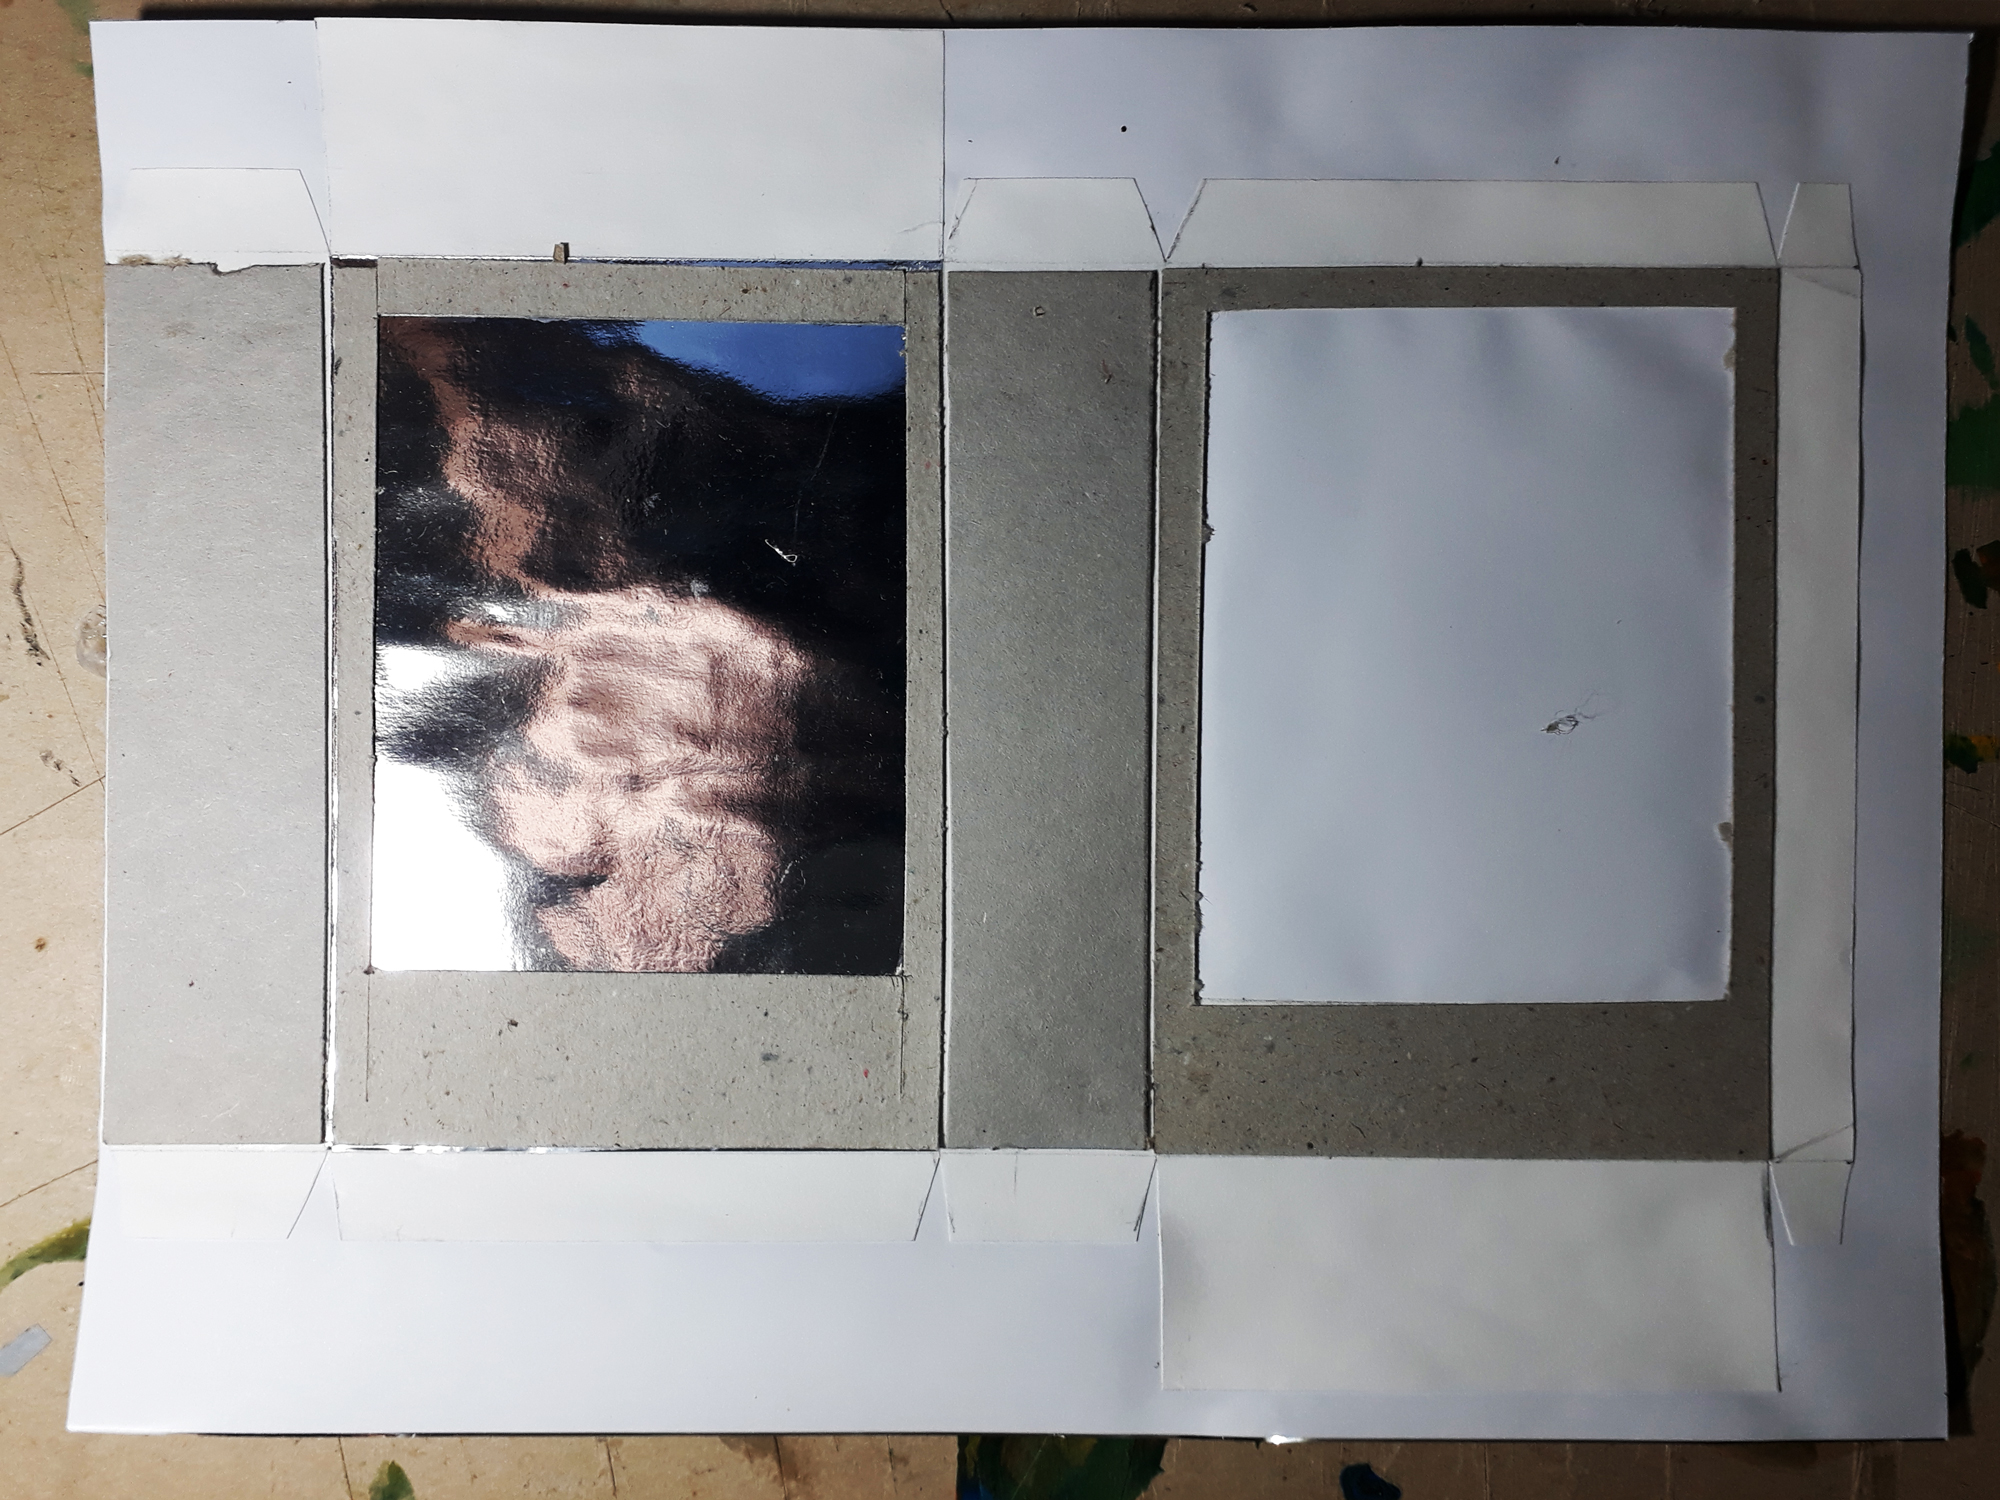
2) Adicionamos placas de papel cartão para fazer a estrutura resistente. lembre de não fazer exatamente do tamanho do desenho pois ao dobrar perdemos alguns milimetros de área interna. A estrutura tem que ser firme o suficiente para não criar “barriga”. Novamente fazemos a moldura para a vitrine e colar um fundo de cartolina metálica para a parte interna.
3) Agora é hora de recortar e vincar. verifique se a estrutura está fechando corretamente.
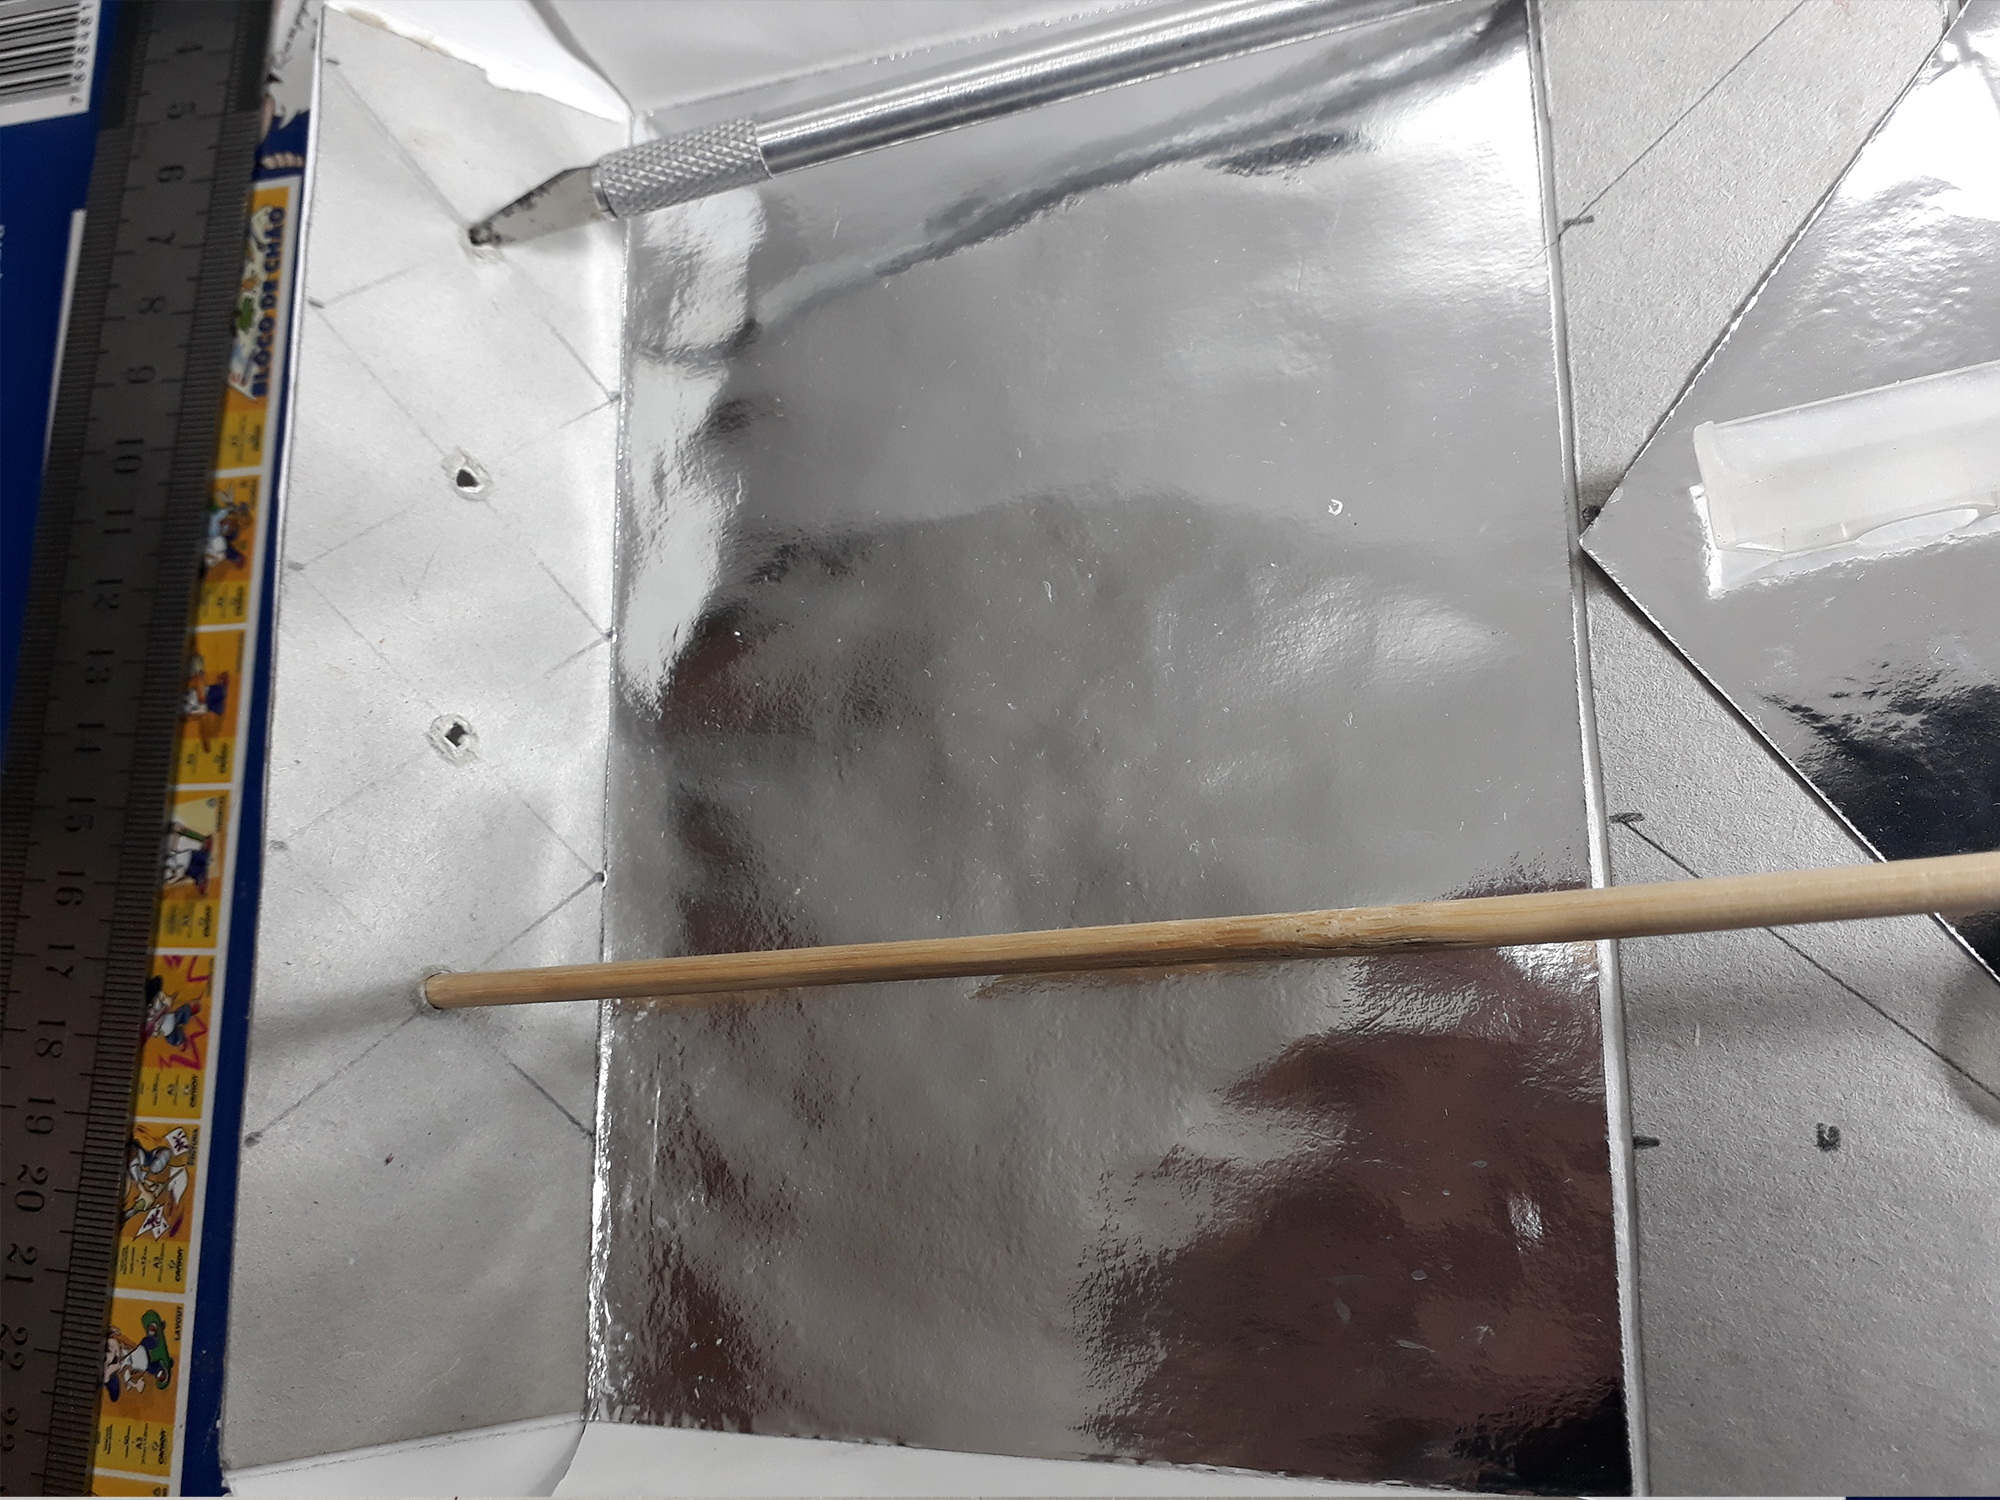
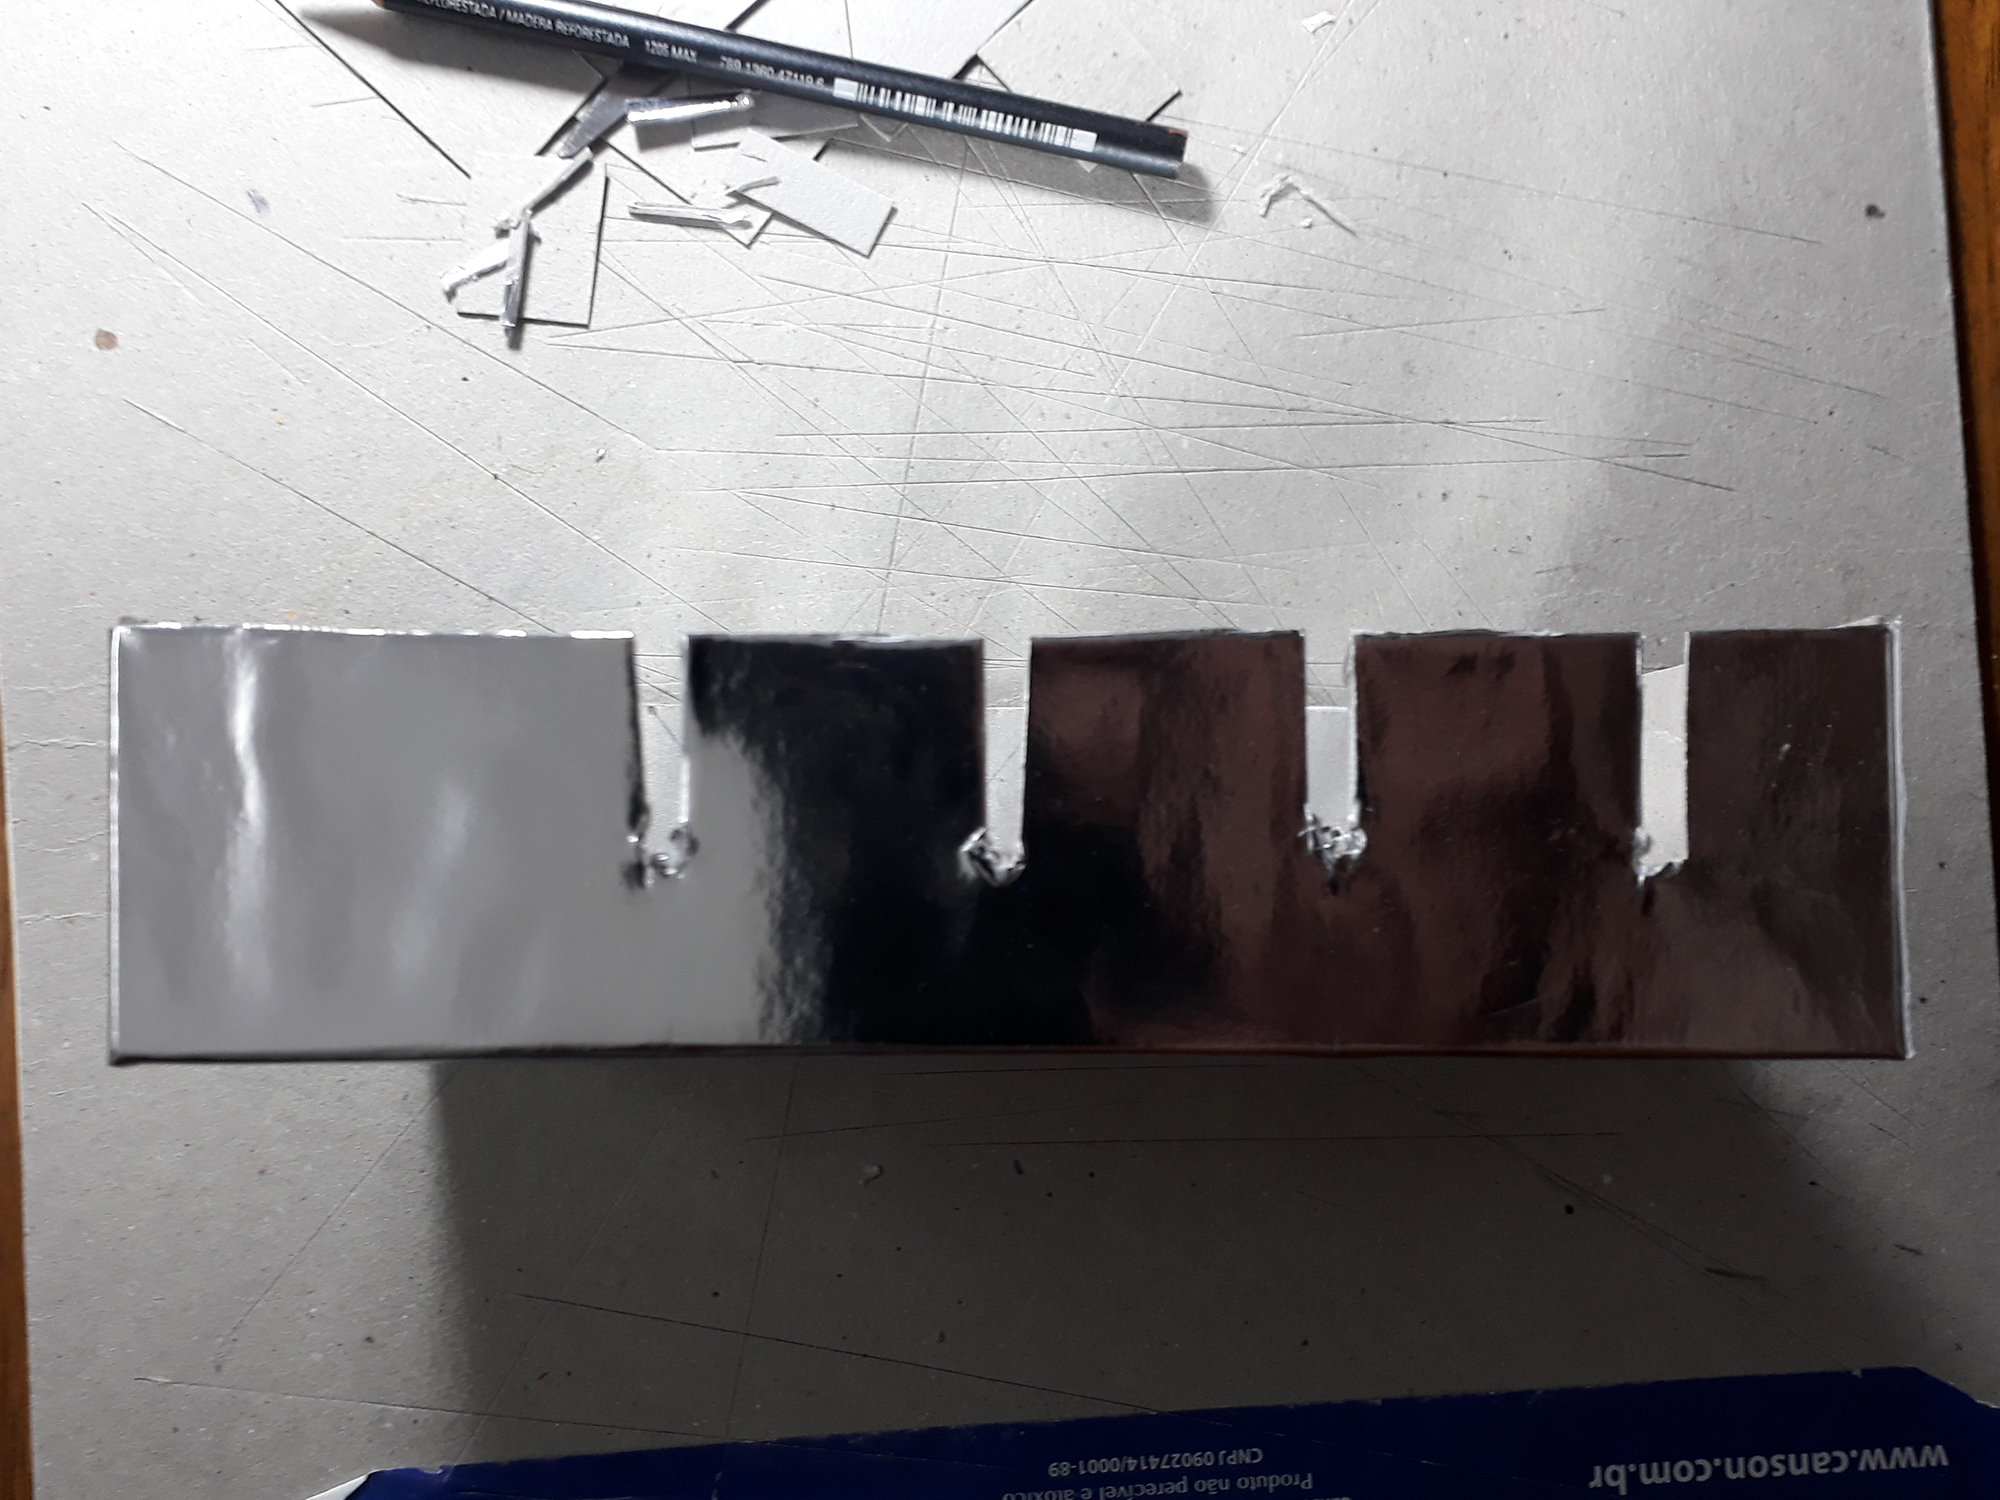
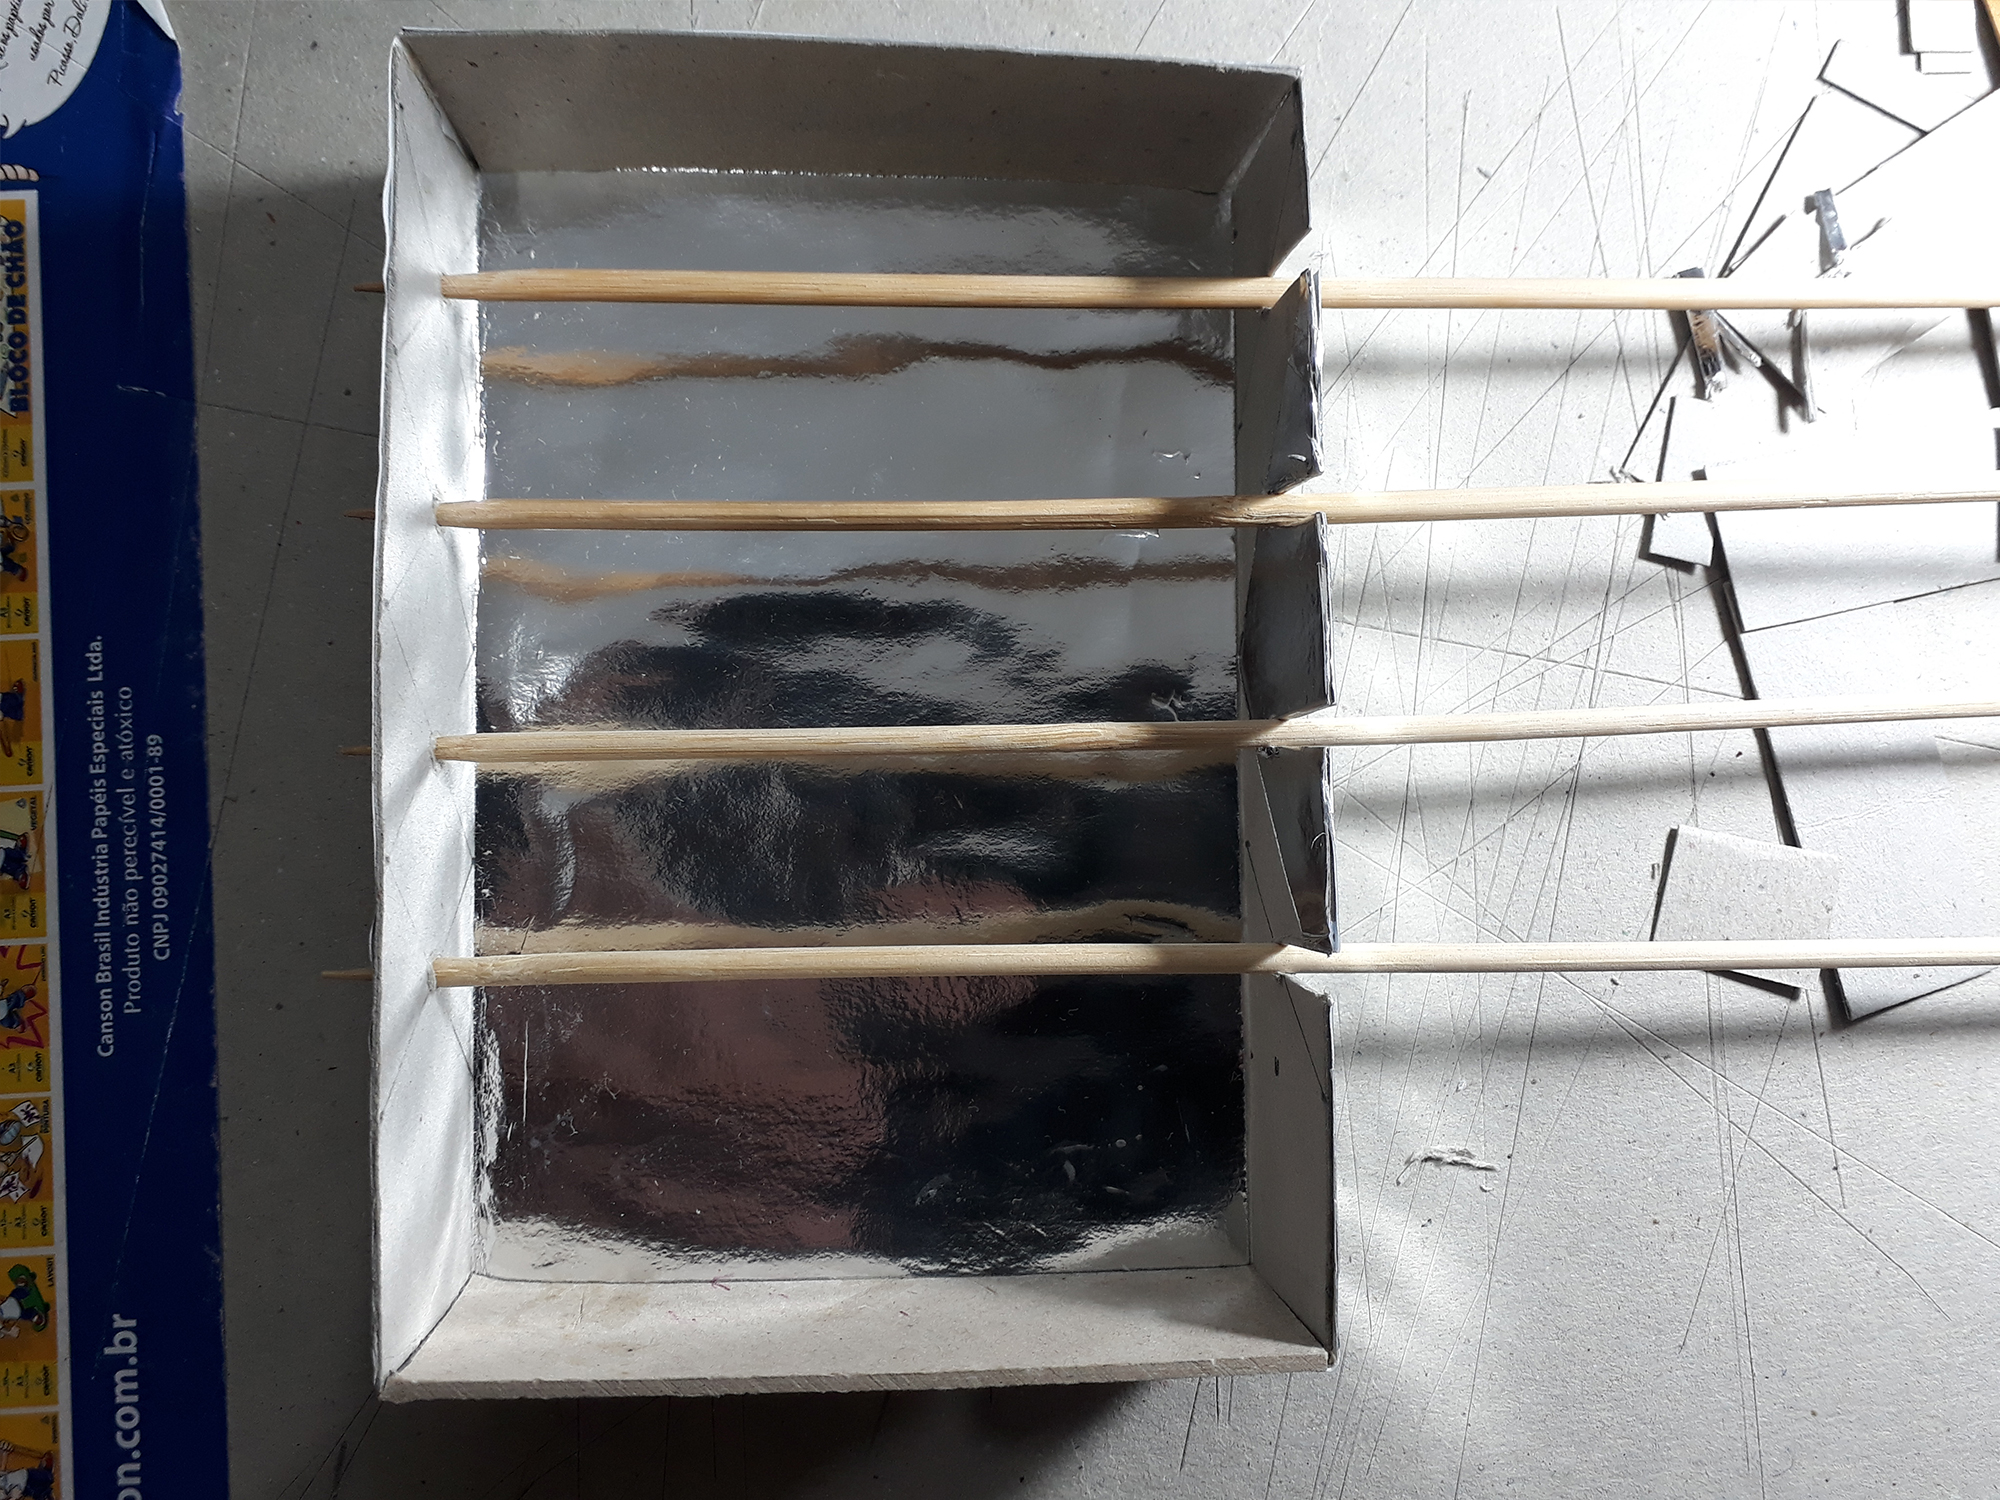
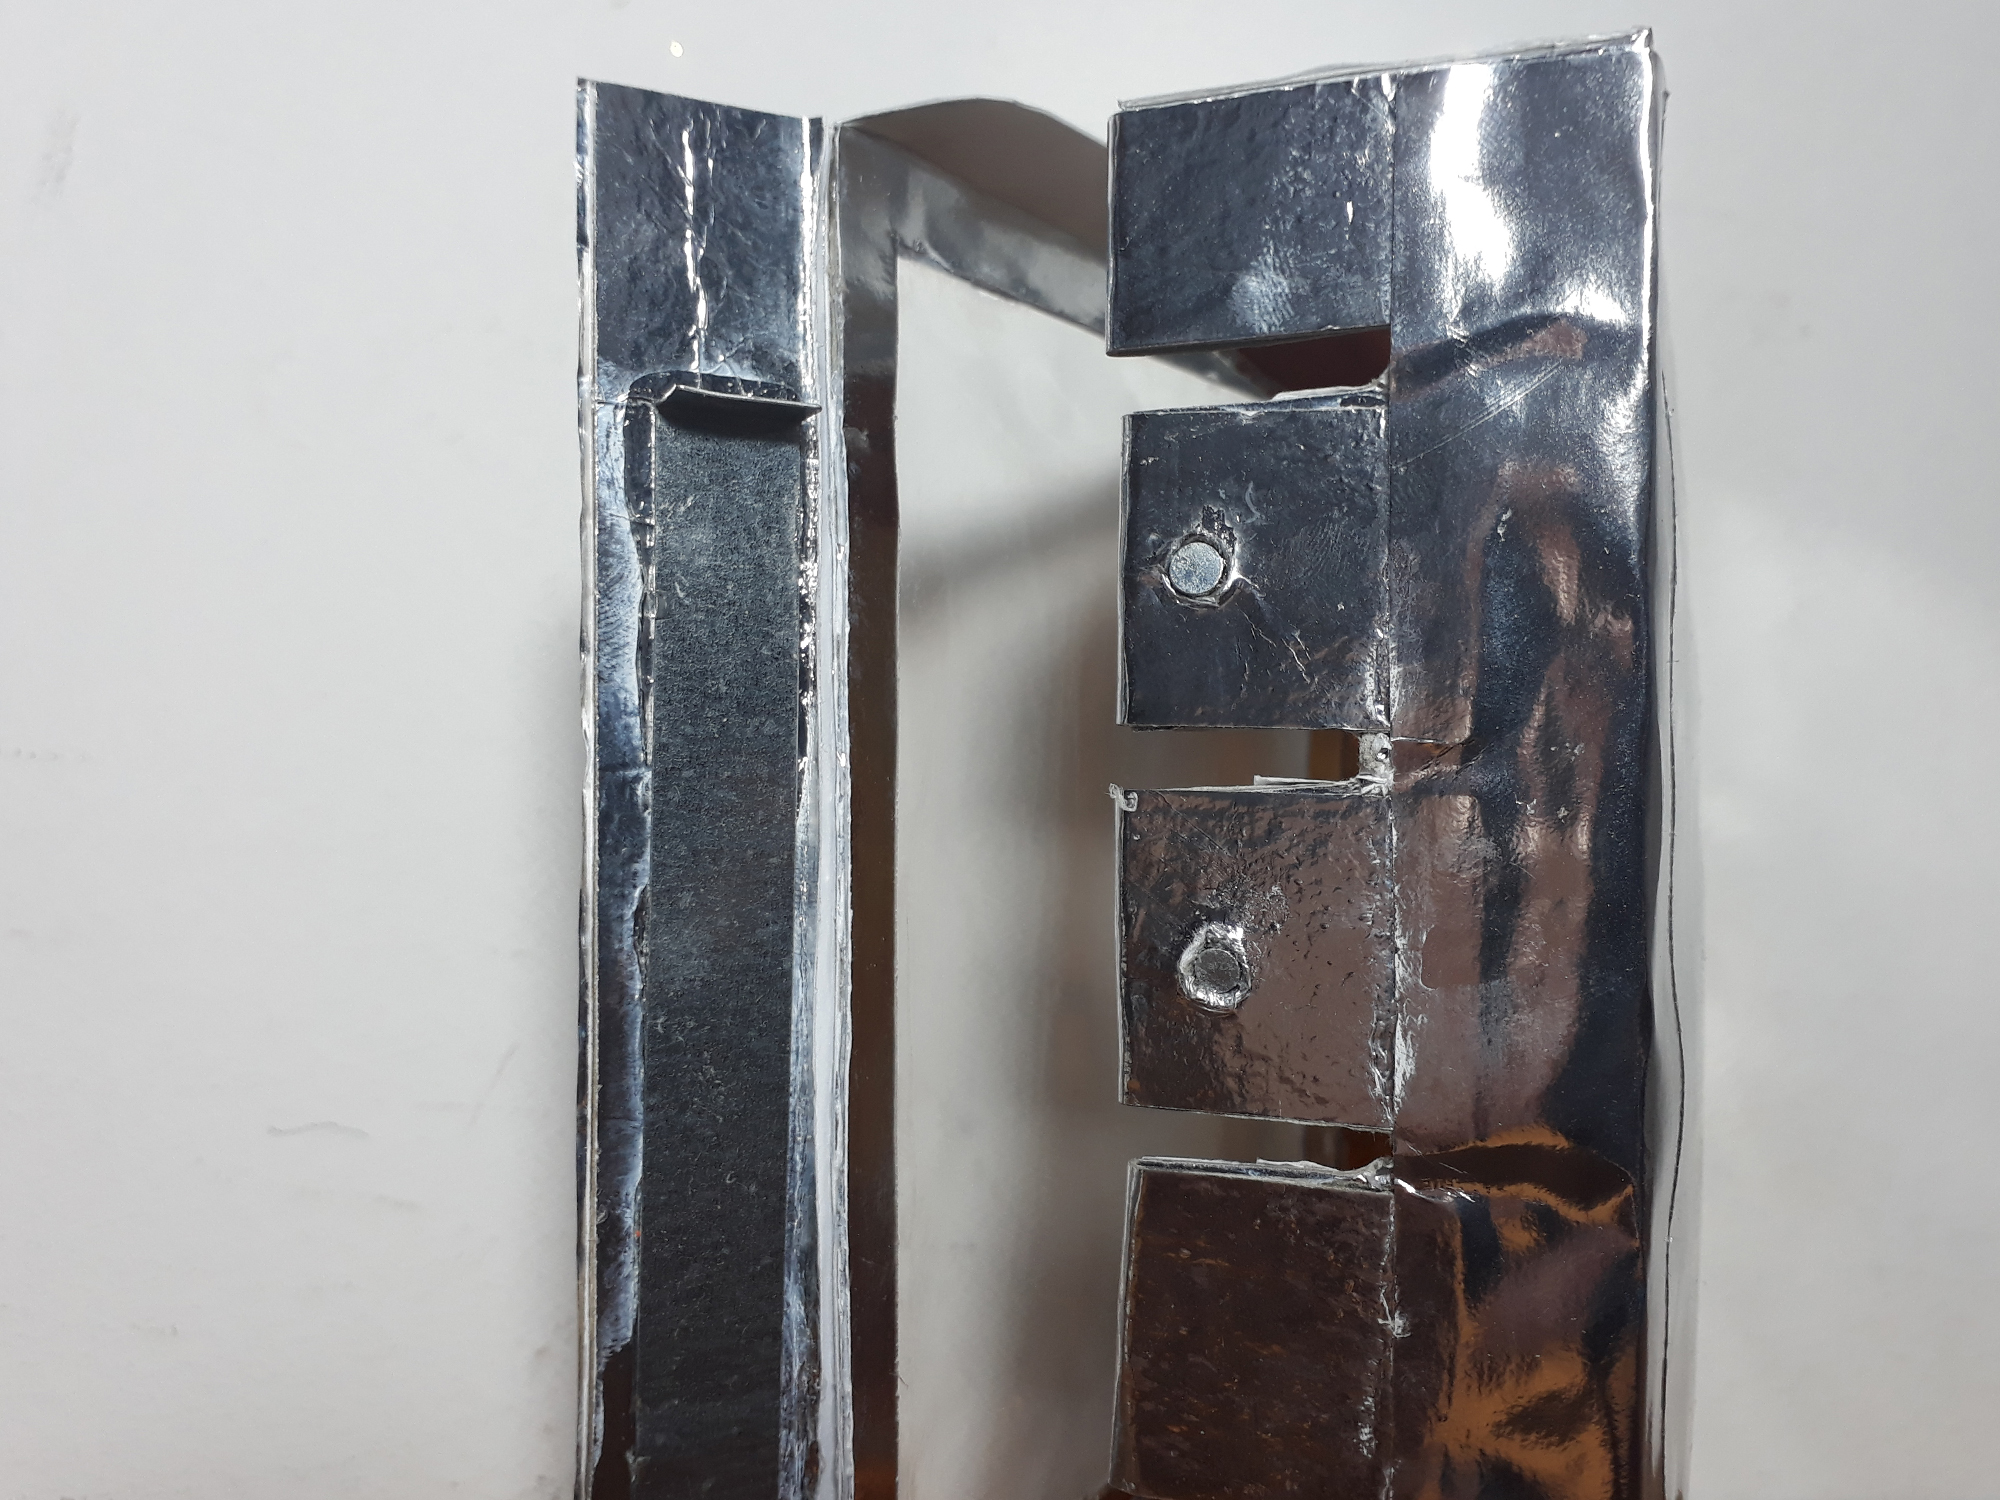
4) Antes de fechar a caixa vamos fazer as marcações para o eixo e as baias dos espetos. Dividindo igualmente o espaço visível da vitrine. Em uma das laetrais vamos cortar as baias para encaixar e retirar os espetos.
5) Feche e cole a caixa e verifique se as baias para os espetos estão alinhadas.
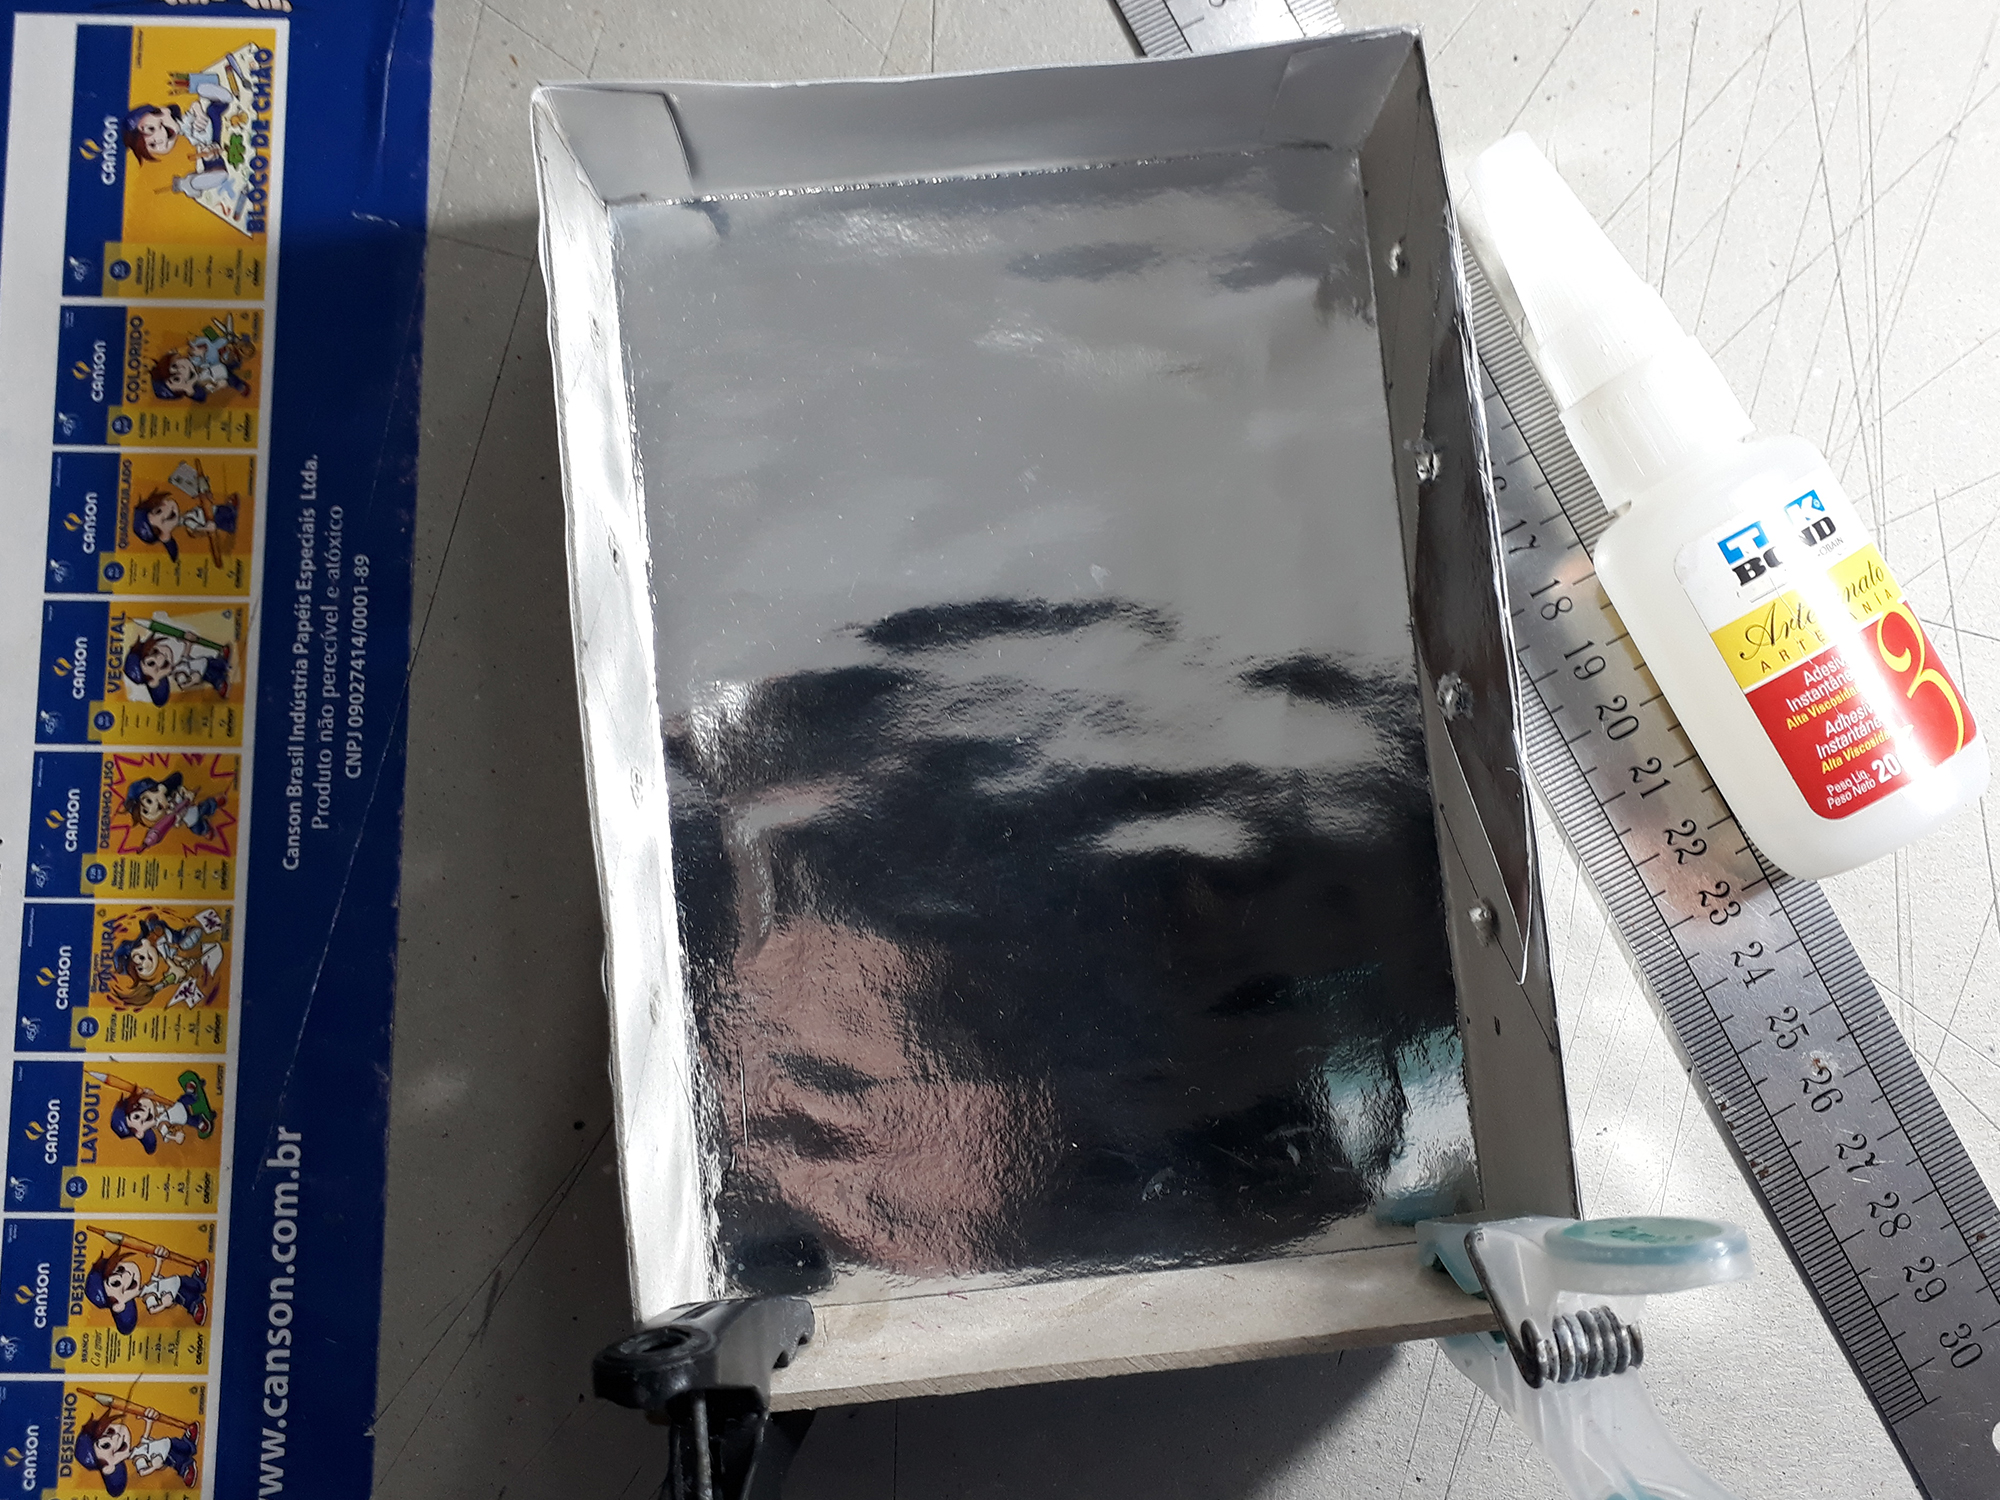
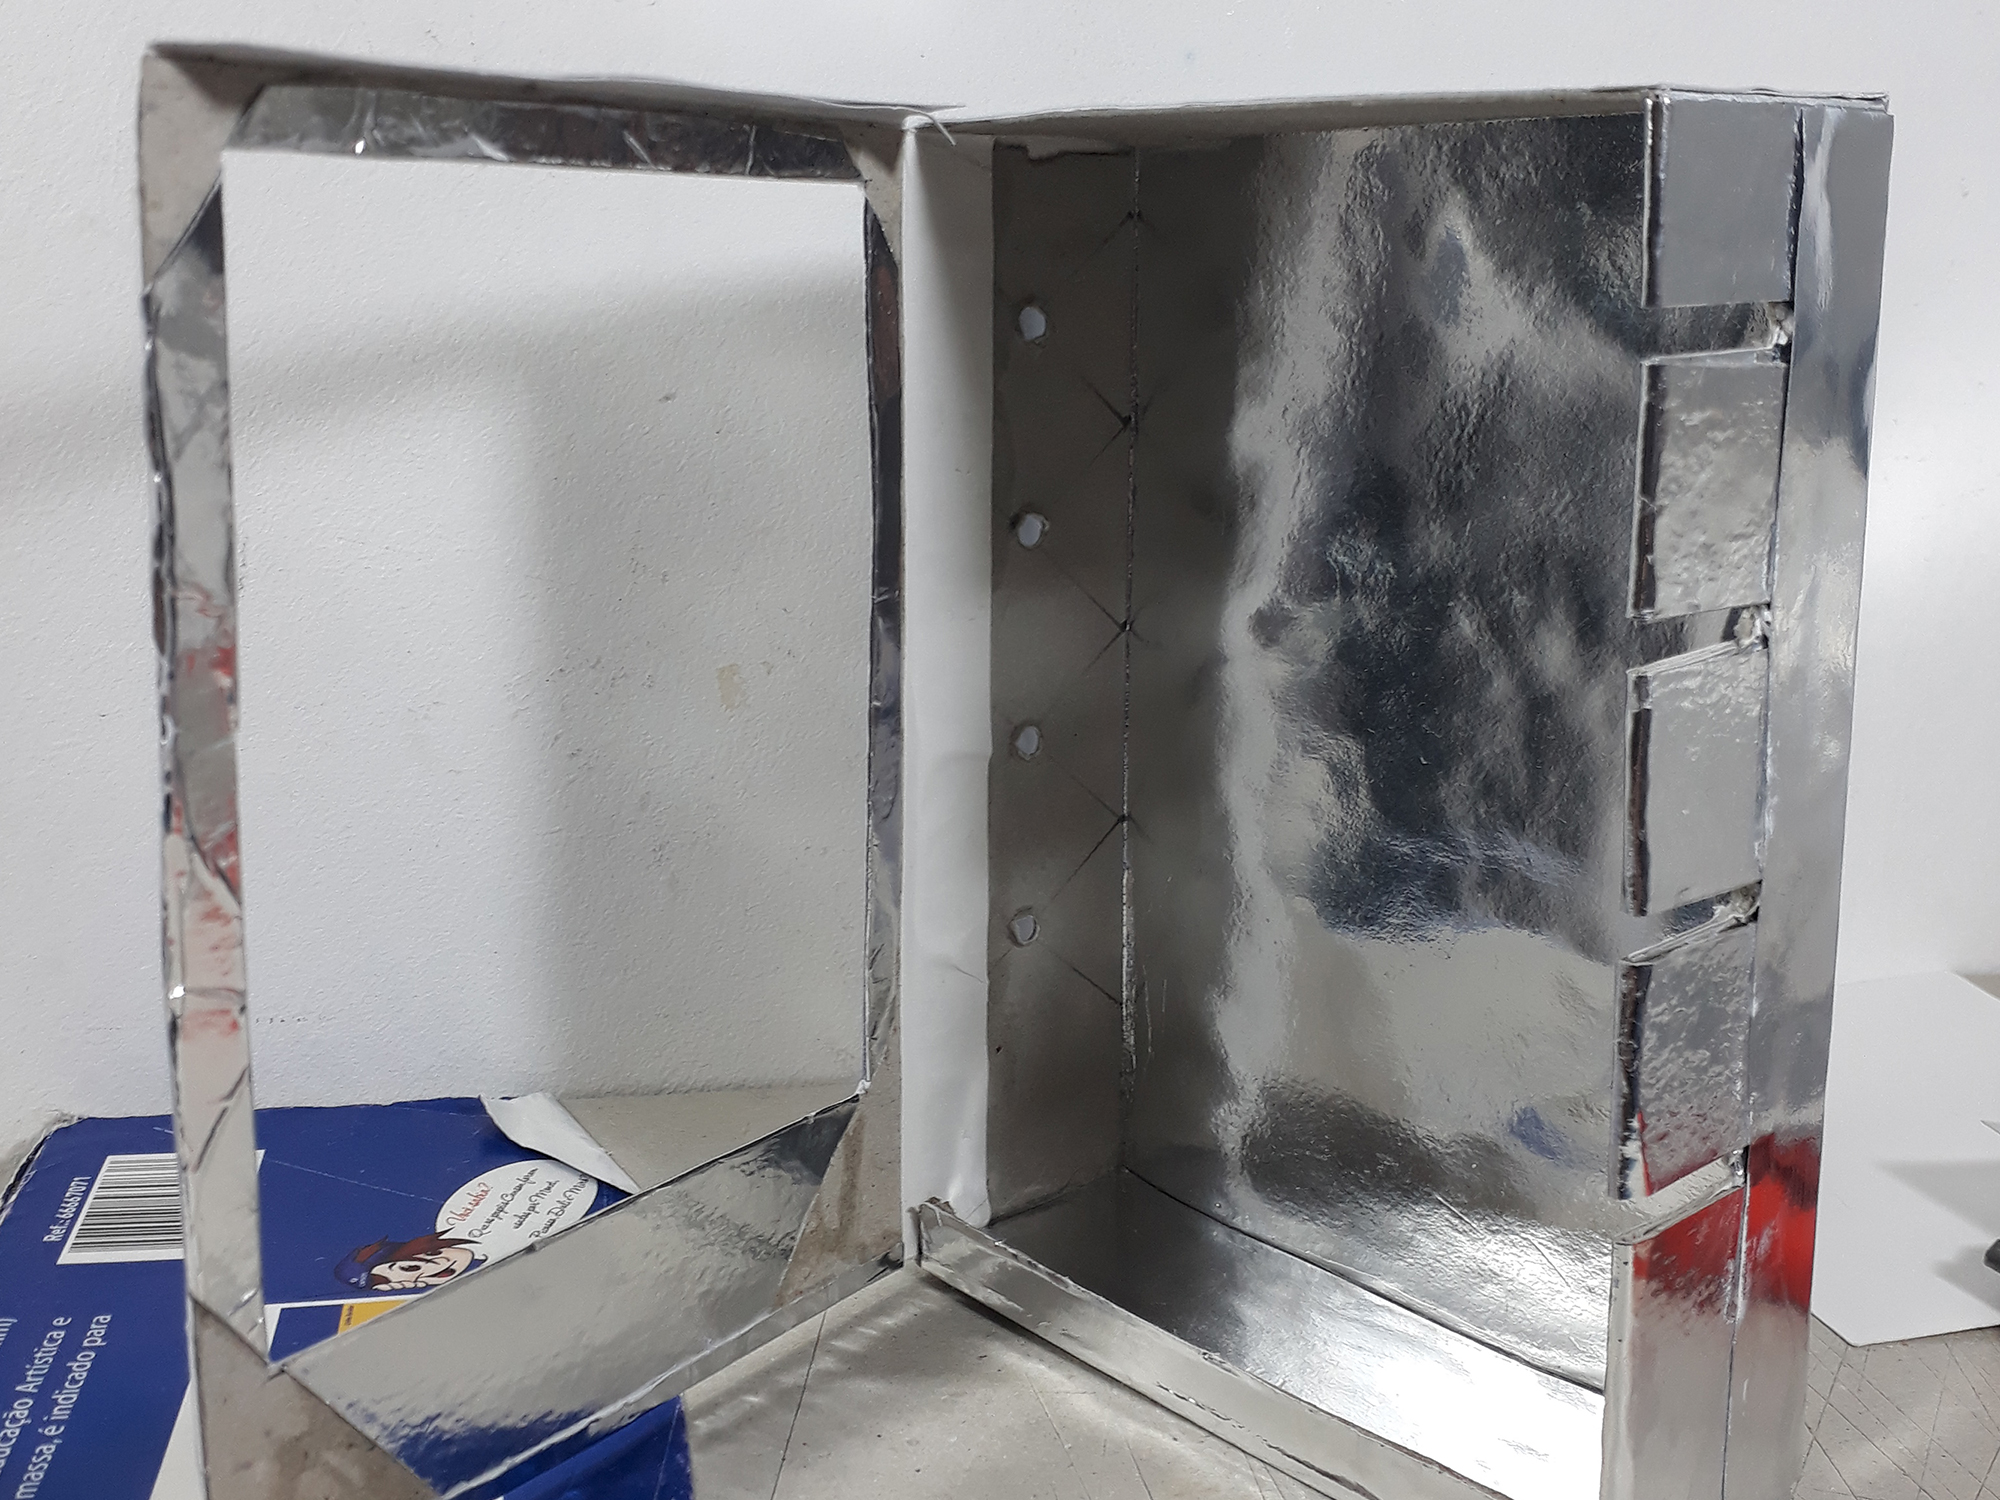
6) Agora vamos completar o piso e teto interno com o papel cartão. Acrescentei também duas abas de moldura interna na parte de cima e de baixo.
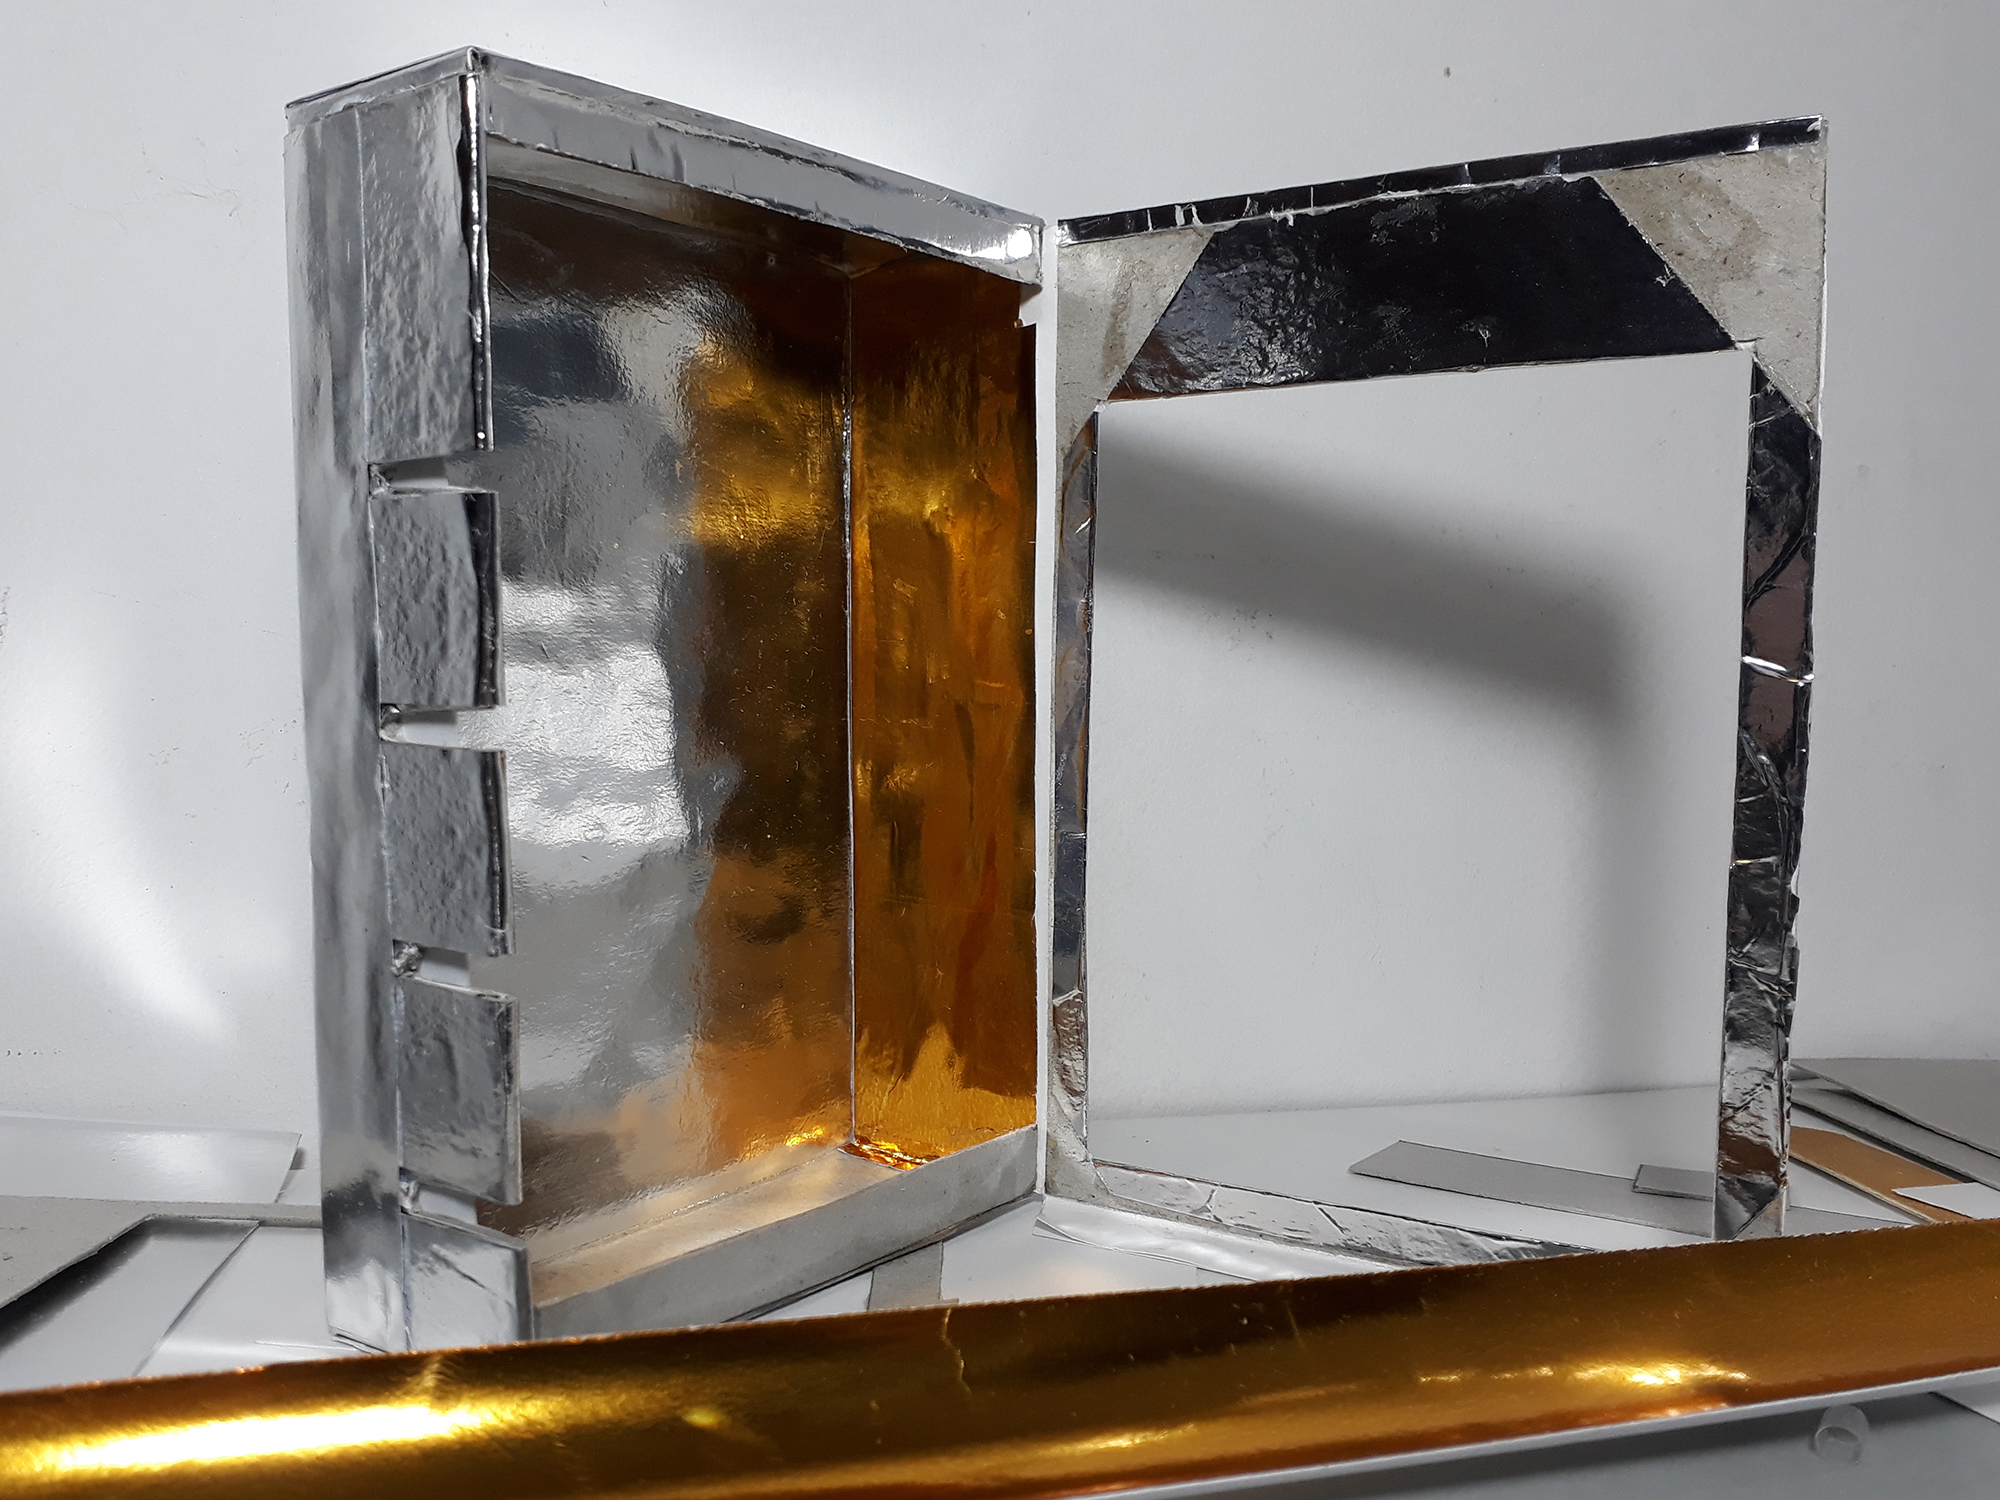
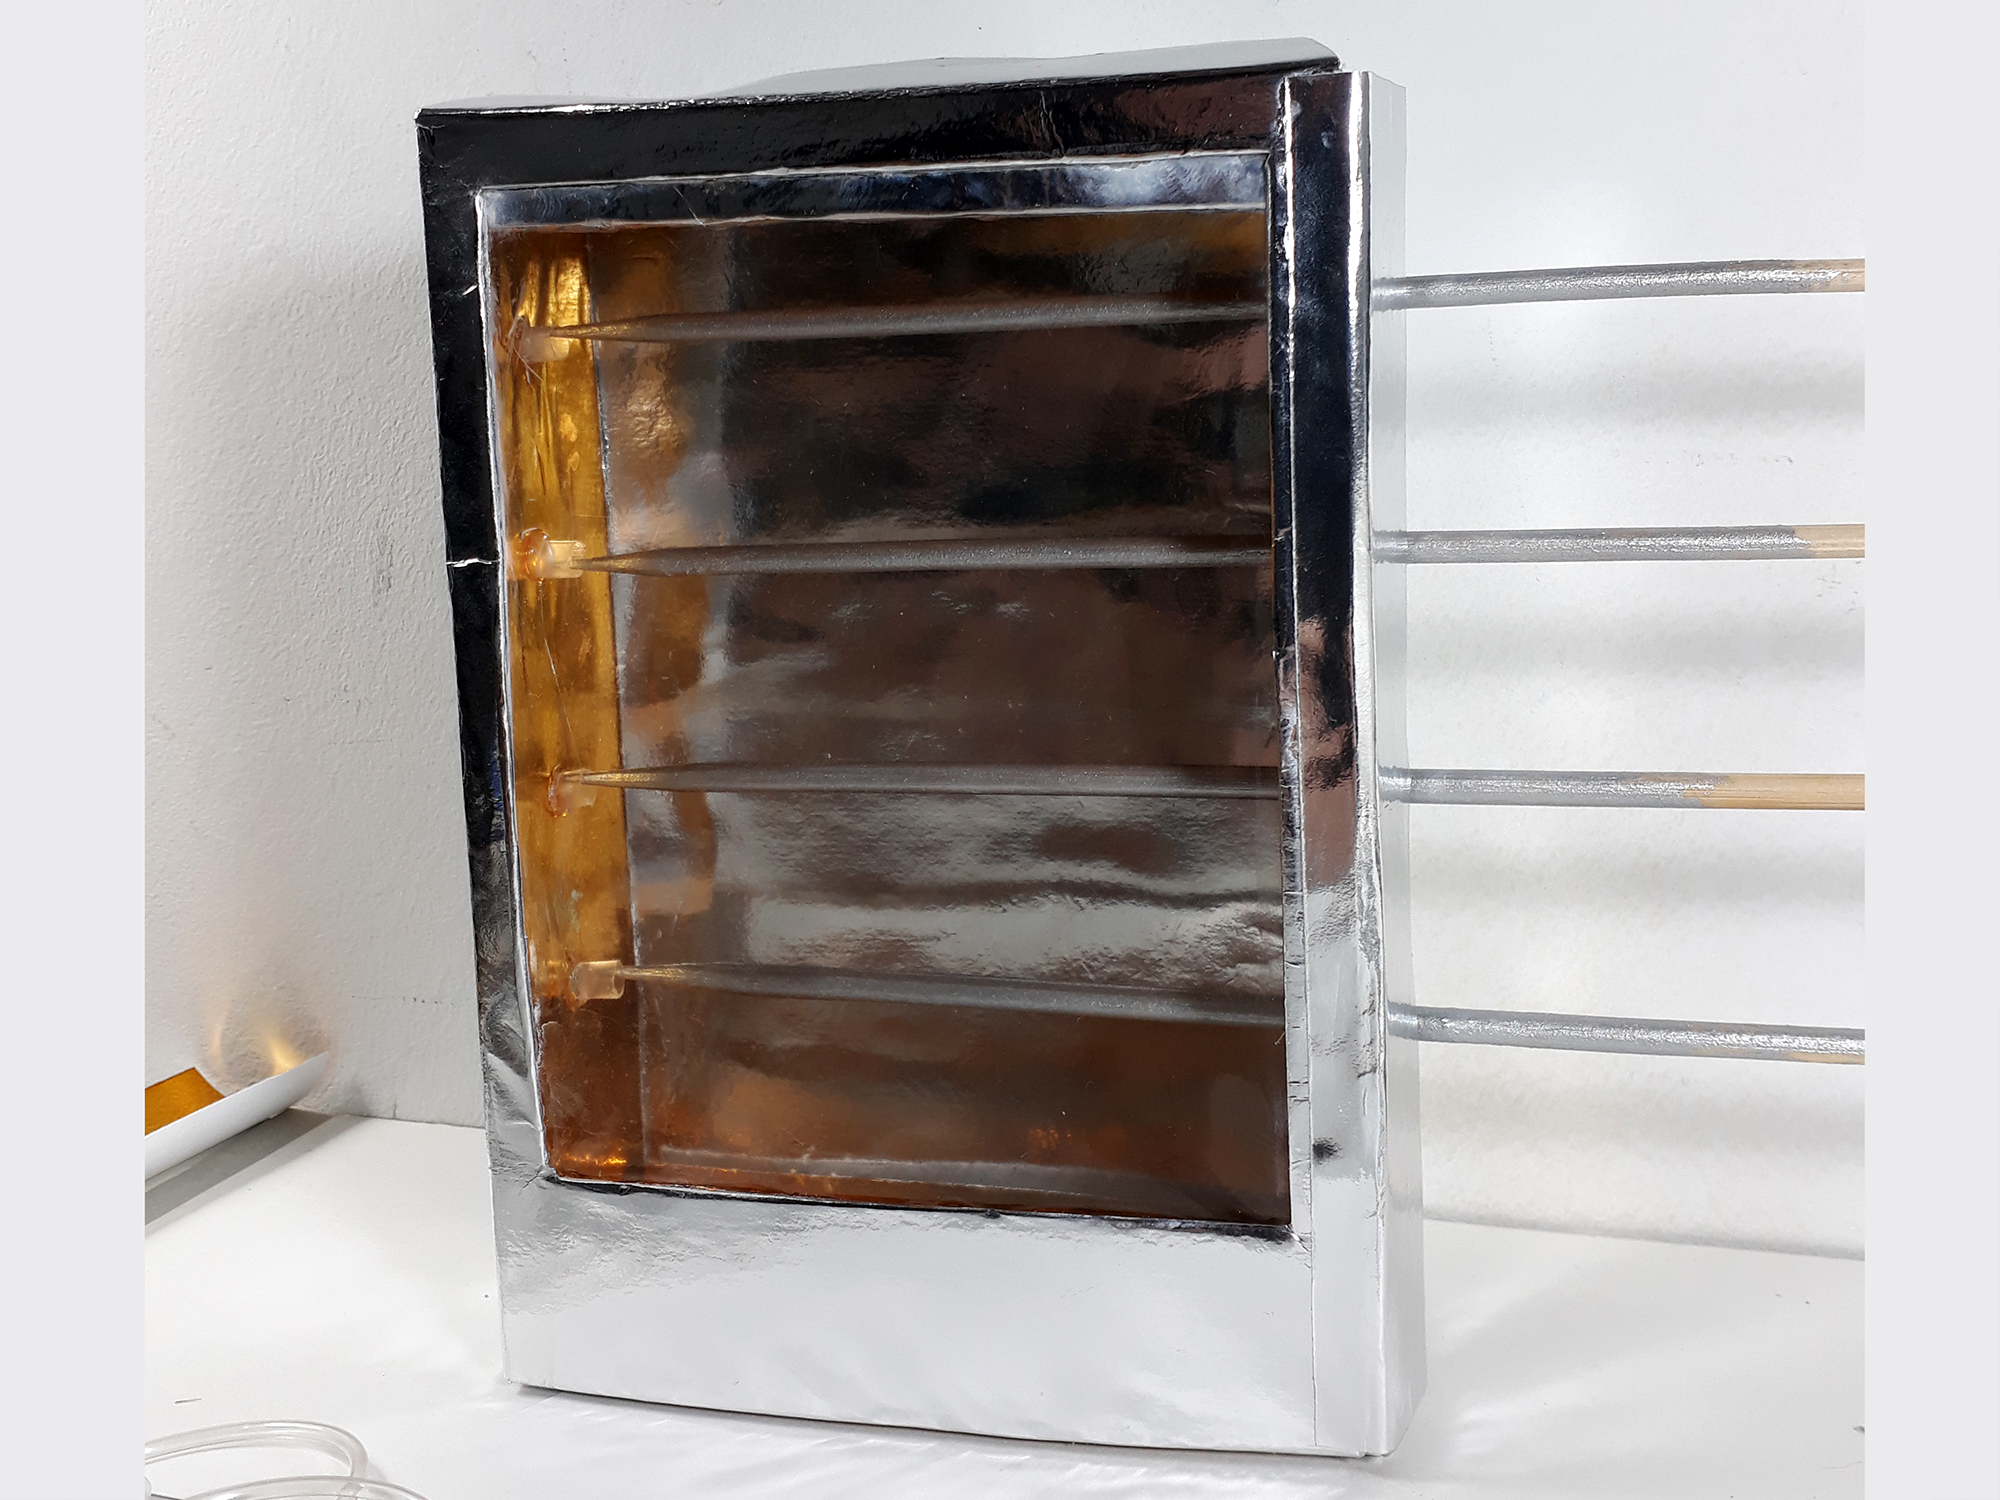
7) Agora vamos esquentar este forno com efeitos práticos: A cartolina laminada dourada revestindo as laterais, fundo e teto fará o reflexo da luz iluminar o forno!
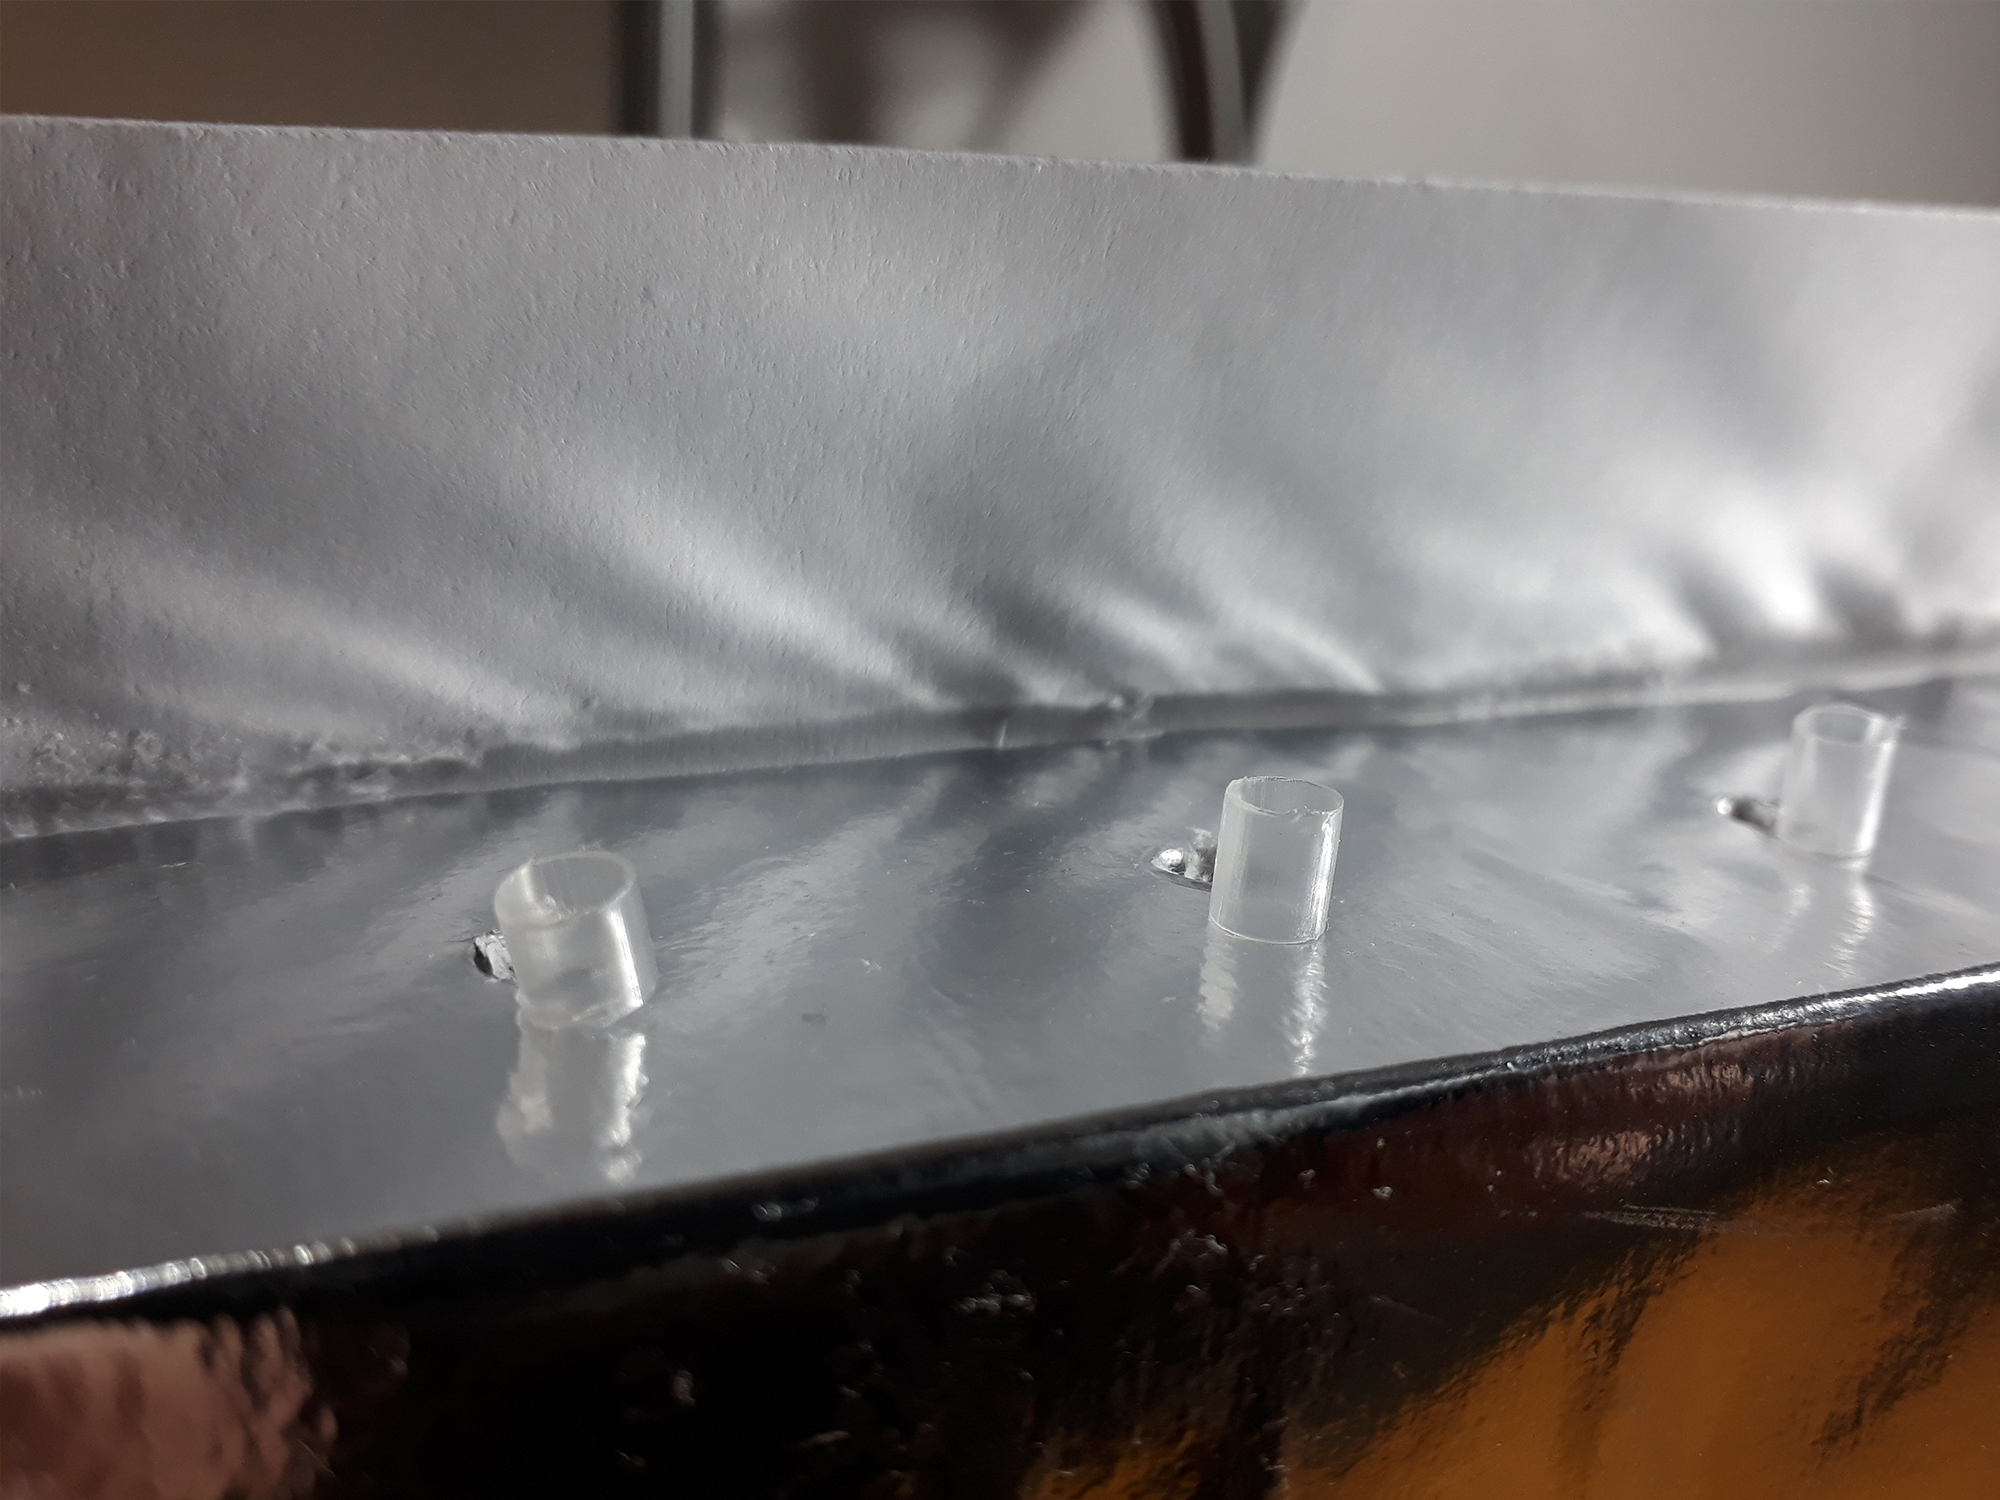
8) Para os espetos ficarem no lugar sem ter que furar a lateral do forno, vamos usar pequenos pedaços de canudo plástico para segurar a ponta do espeto. Cole com cola quente na marcação do eixo.
9) Hora de fechar a vitrine. Acetato transparente para o vidro. Eu usei o plastico de uma embalagem. Cole por dentro e faça uma nova camada de cartolina prateada para o acabamento da vitrine por cima do acetato.
10) Agpra precisamos fechar este forno. criei uma aba na porta para ficar sobre a lateral, mas toda esta estrutura acaba não fechando direito. a solução: imãs!
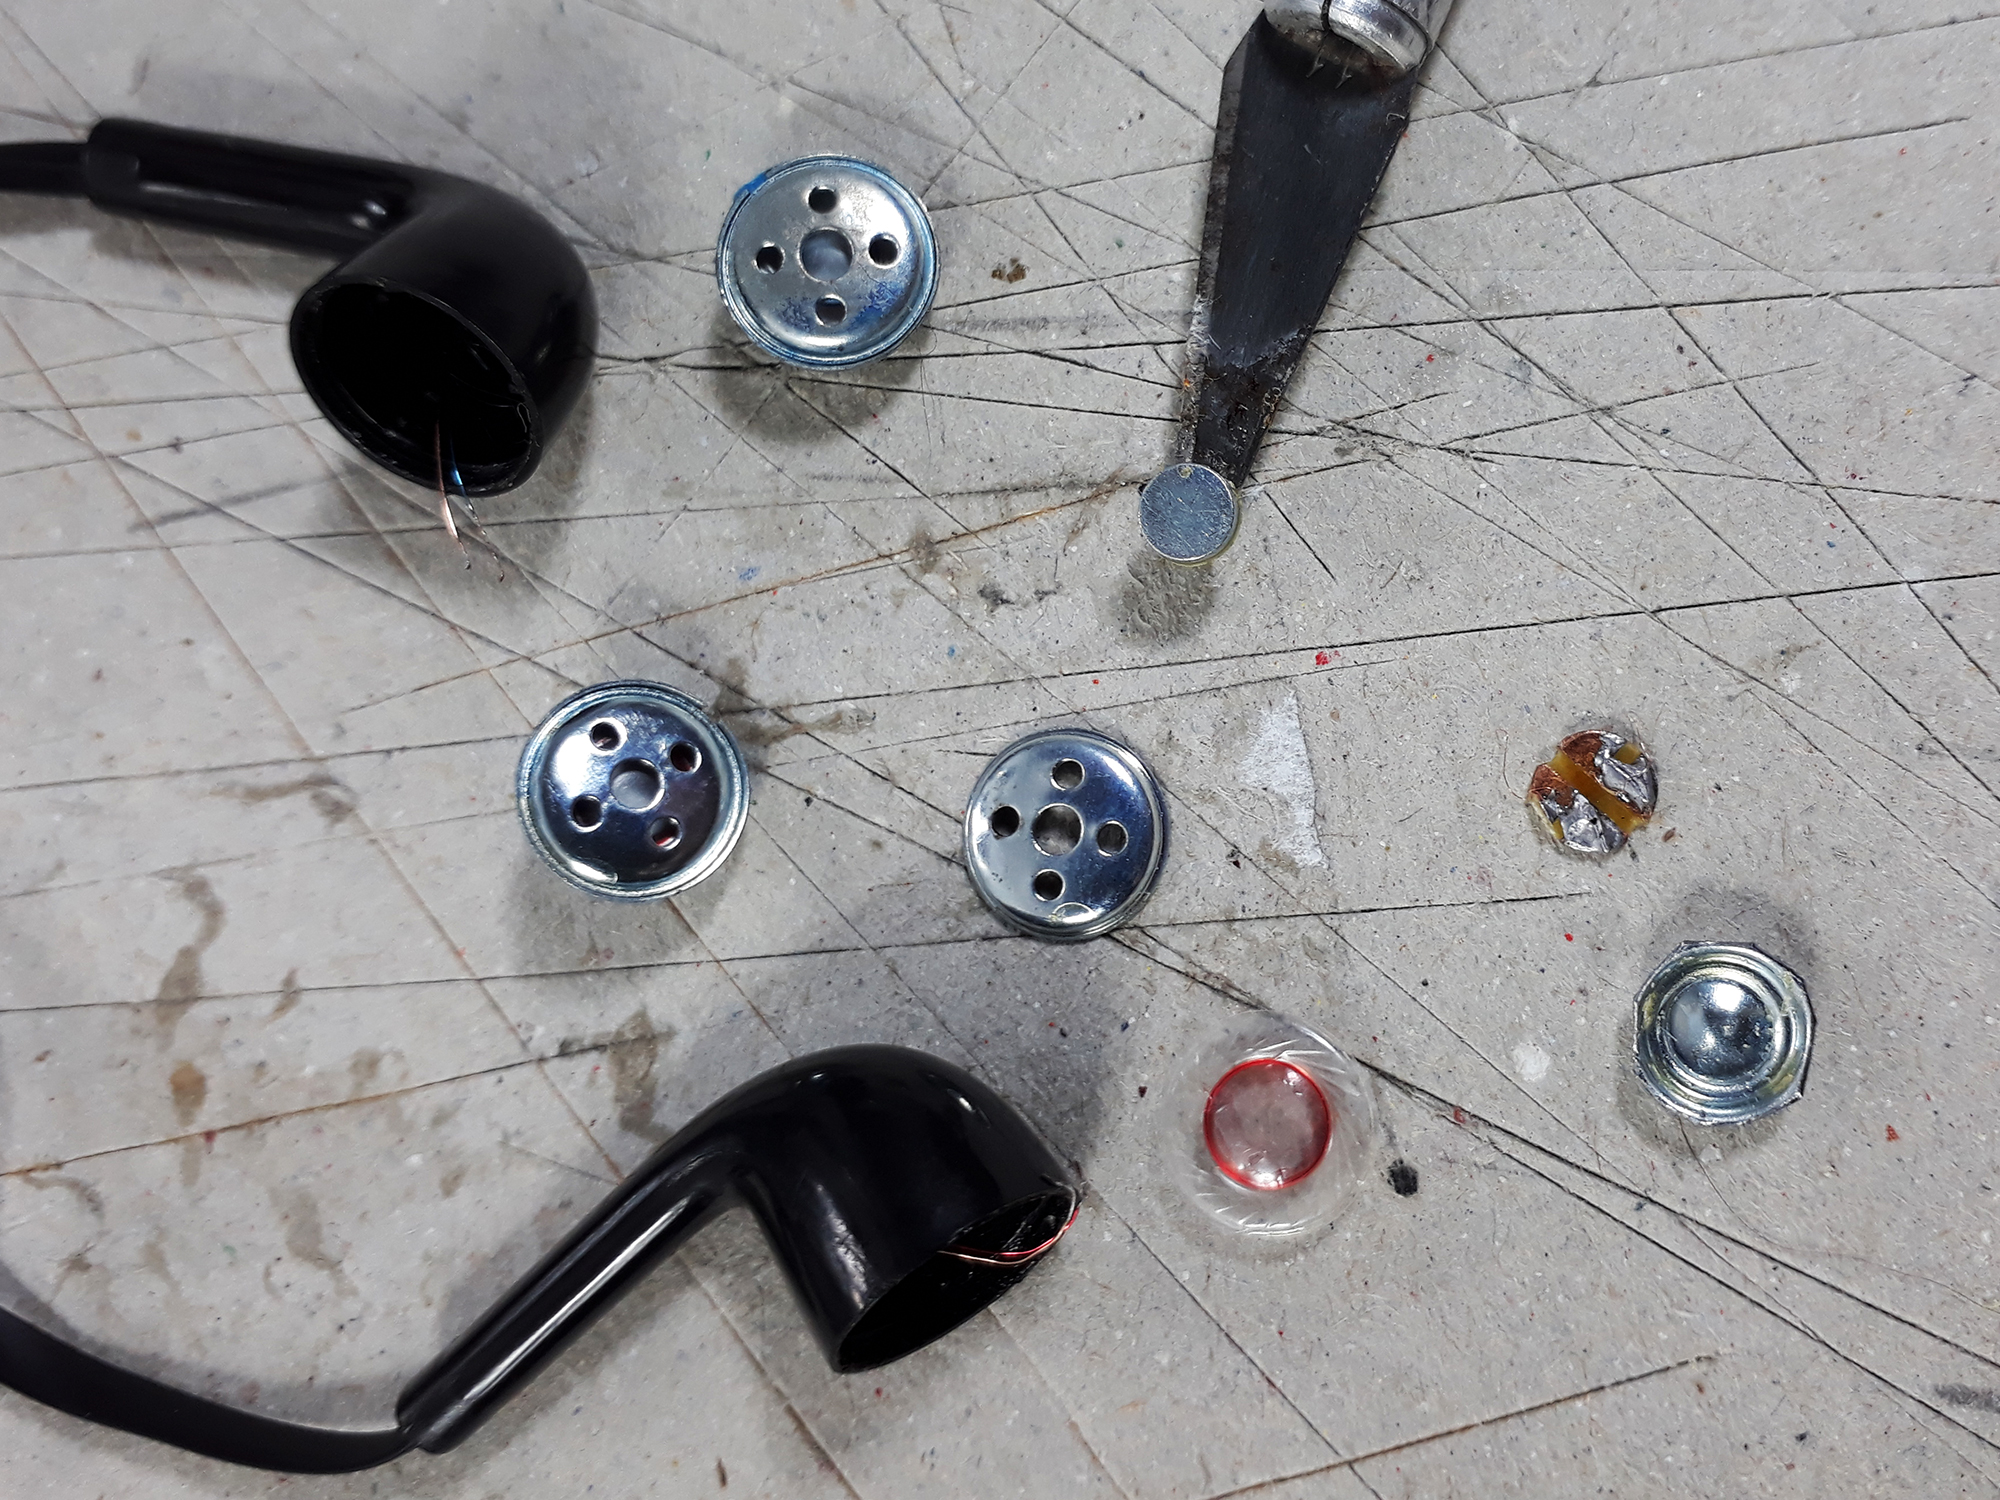
11) Vamos colocar 3 imãs na lateral e uma placa de metal na aba da tampa e pronto! Fechamento magnético!
Dica do Guguinha!
Quer usar imãs em seus projetos mas não pode sair pra comprar? Seus problemas acabaram: use FONES DE OUVIDO! Sim, você ouviu direito! Todo aparelho de som tem imãs. desde as caixas grandes até mesmo os fones. Basta abrir a estrutura, que lá dentro tem um pequeno e potente imã! E considerando a quantidade de fones que estragam, temos um estoque praticamente infinito de imãs!
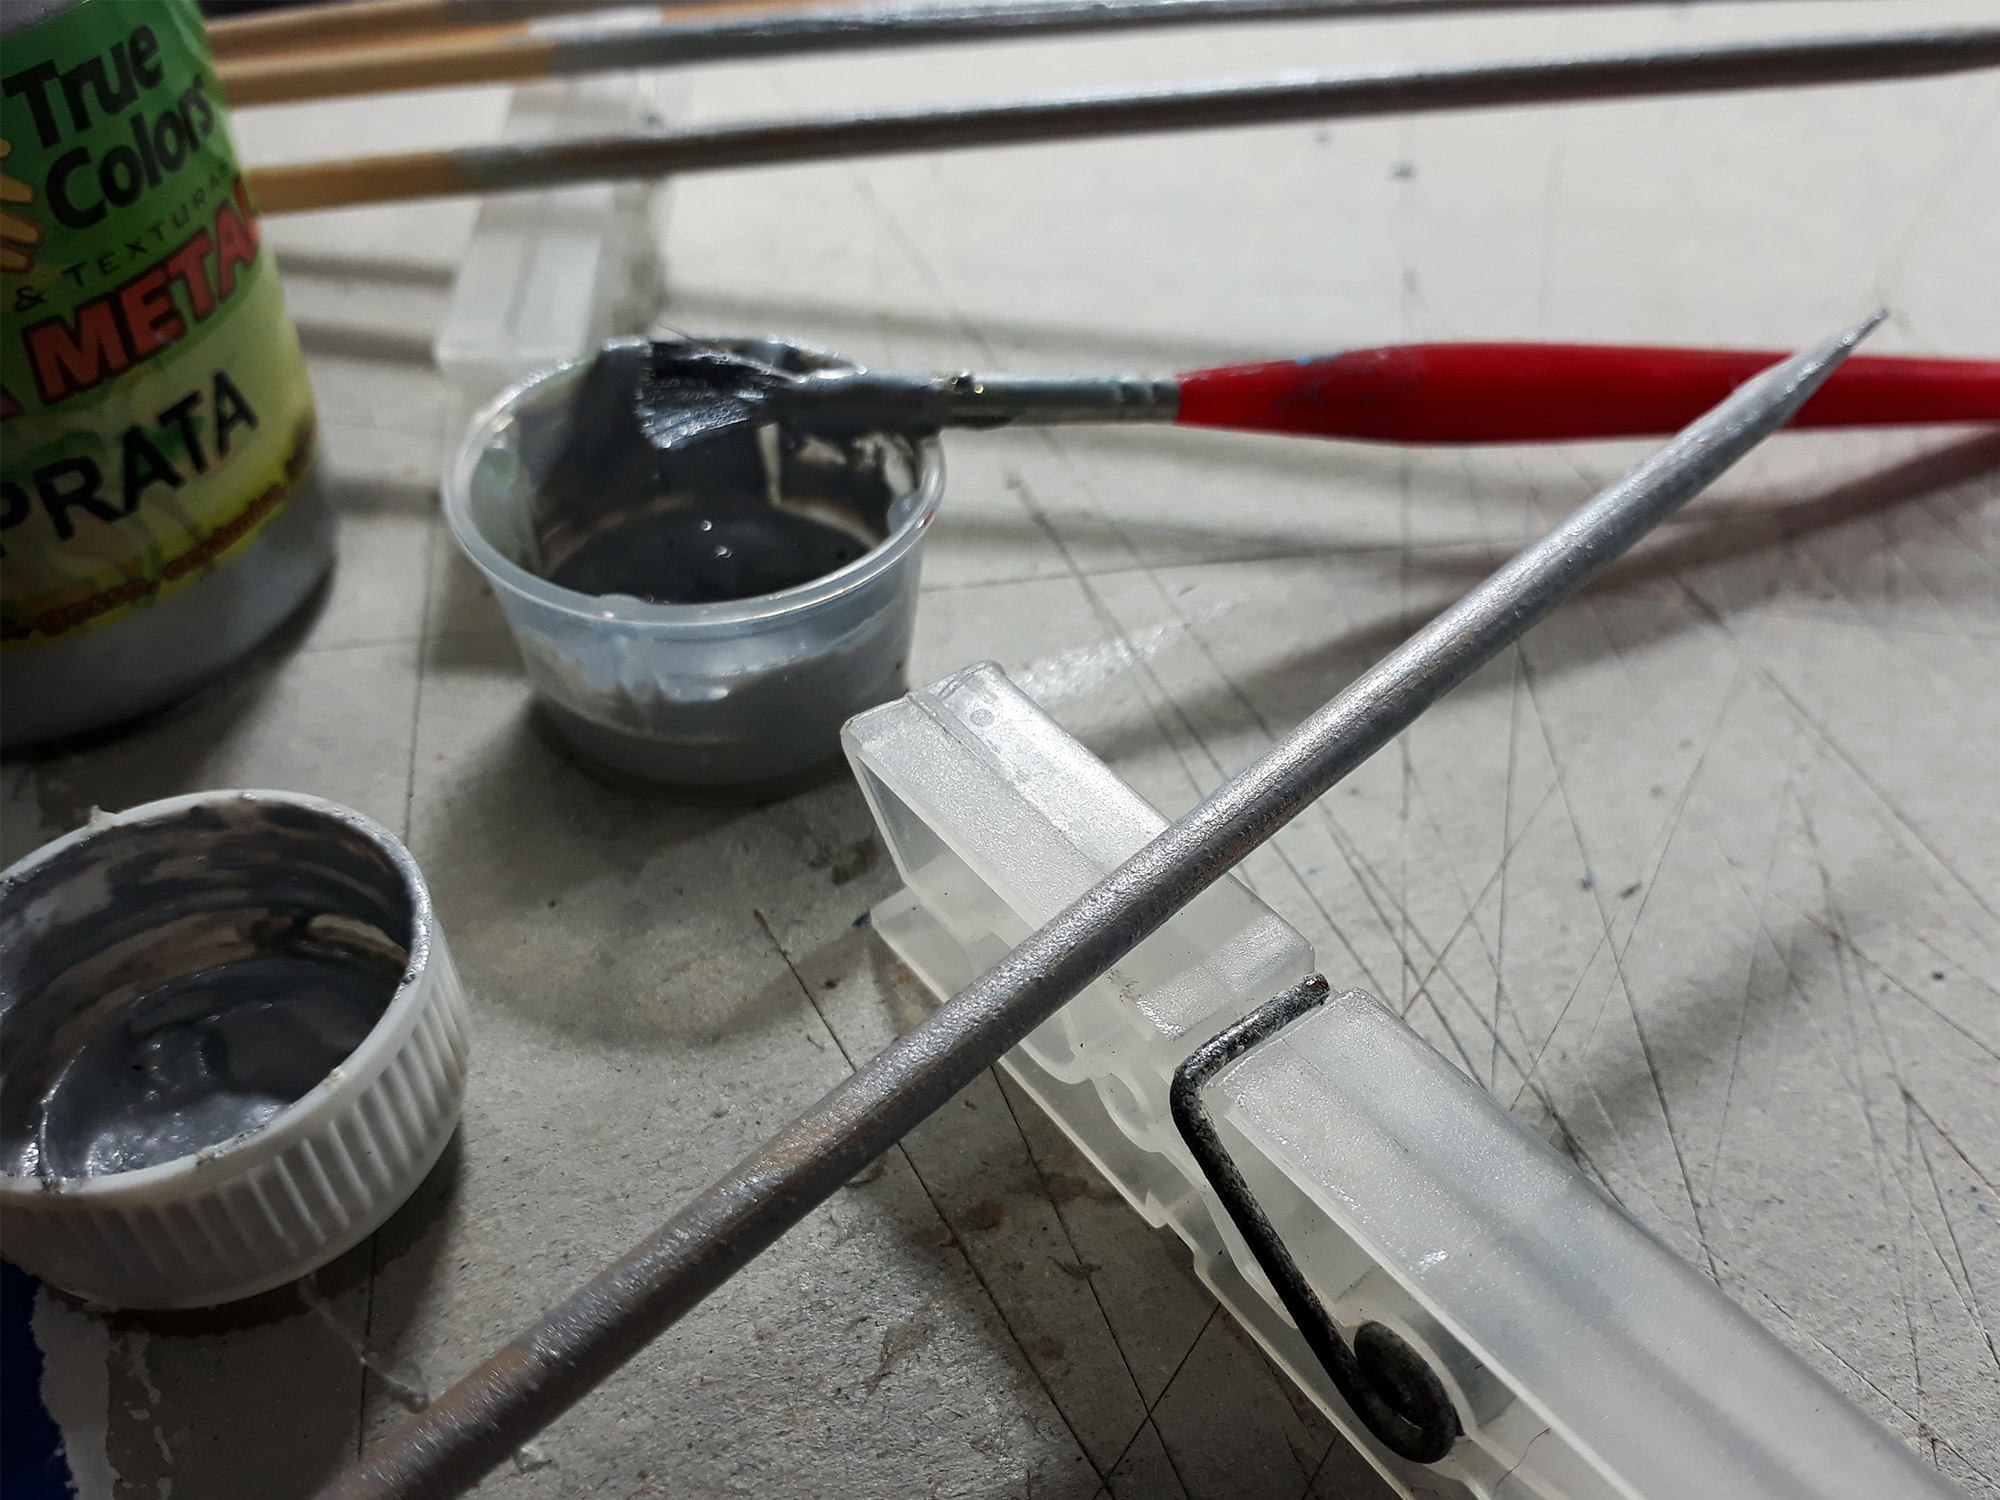
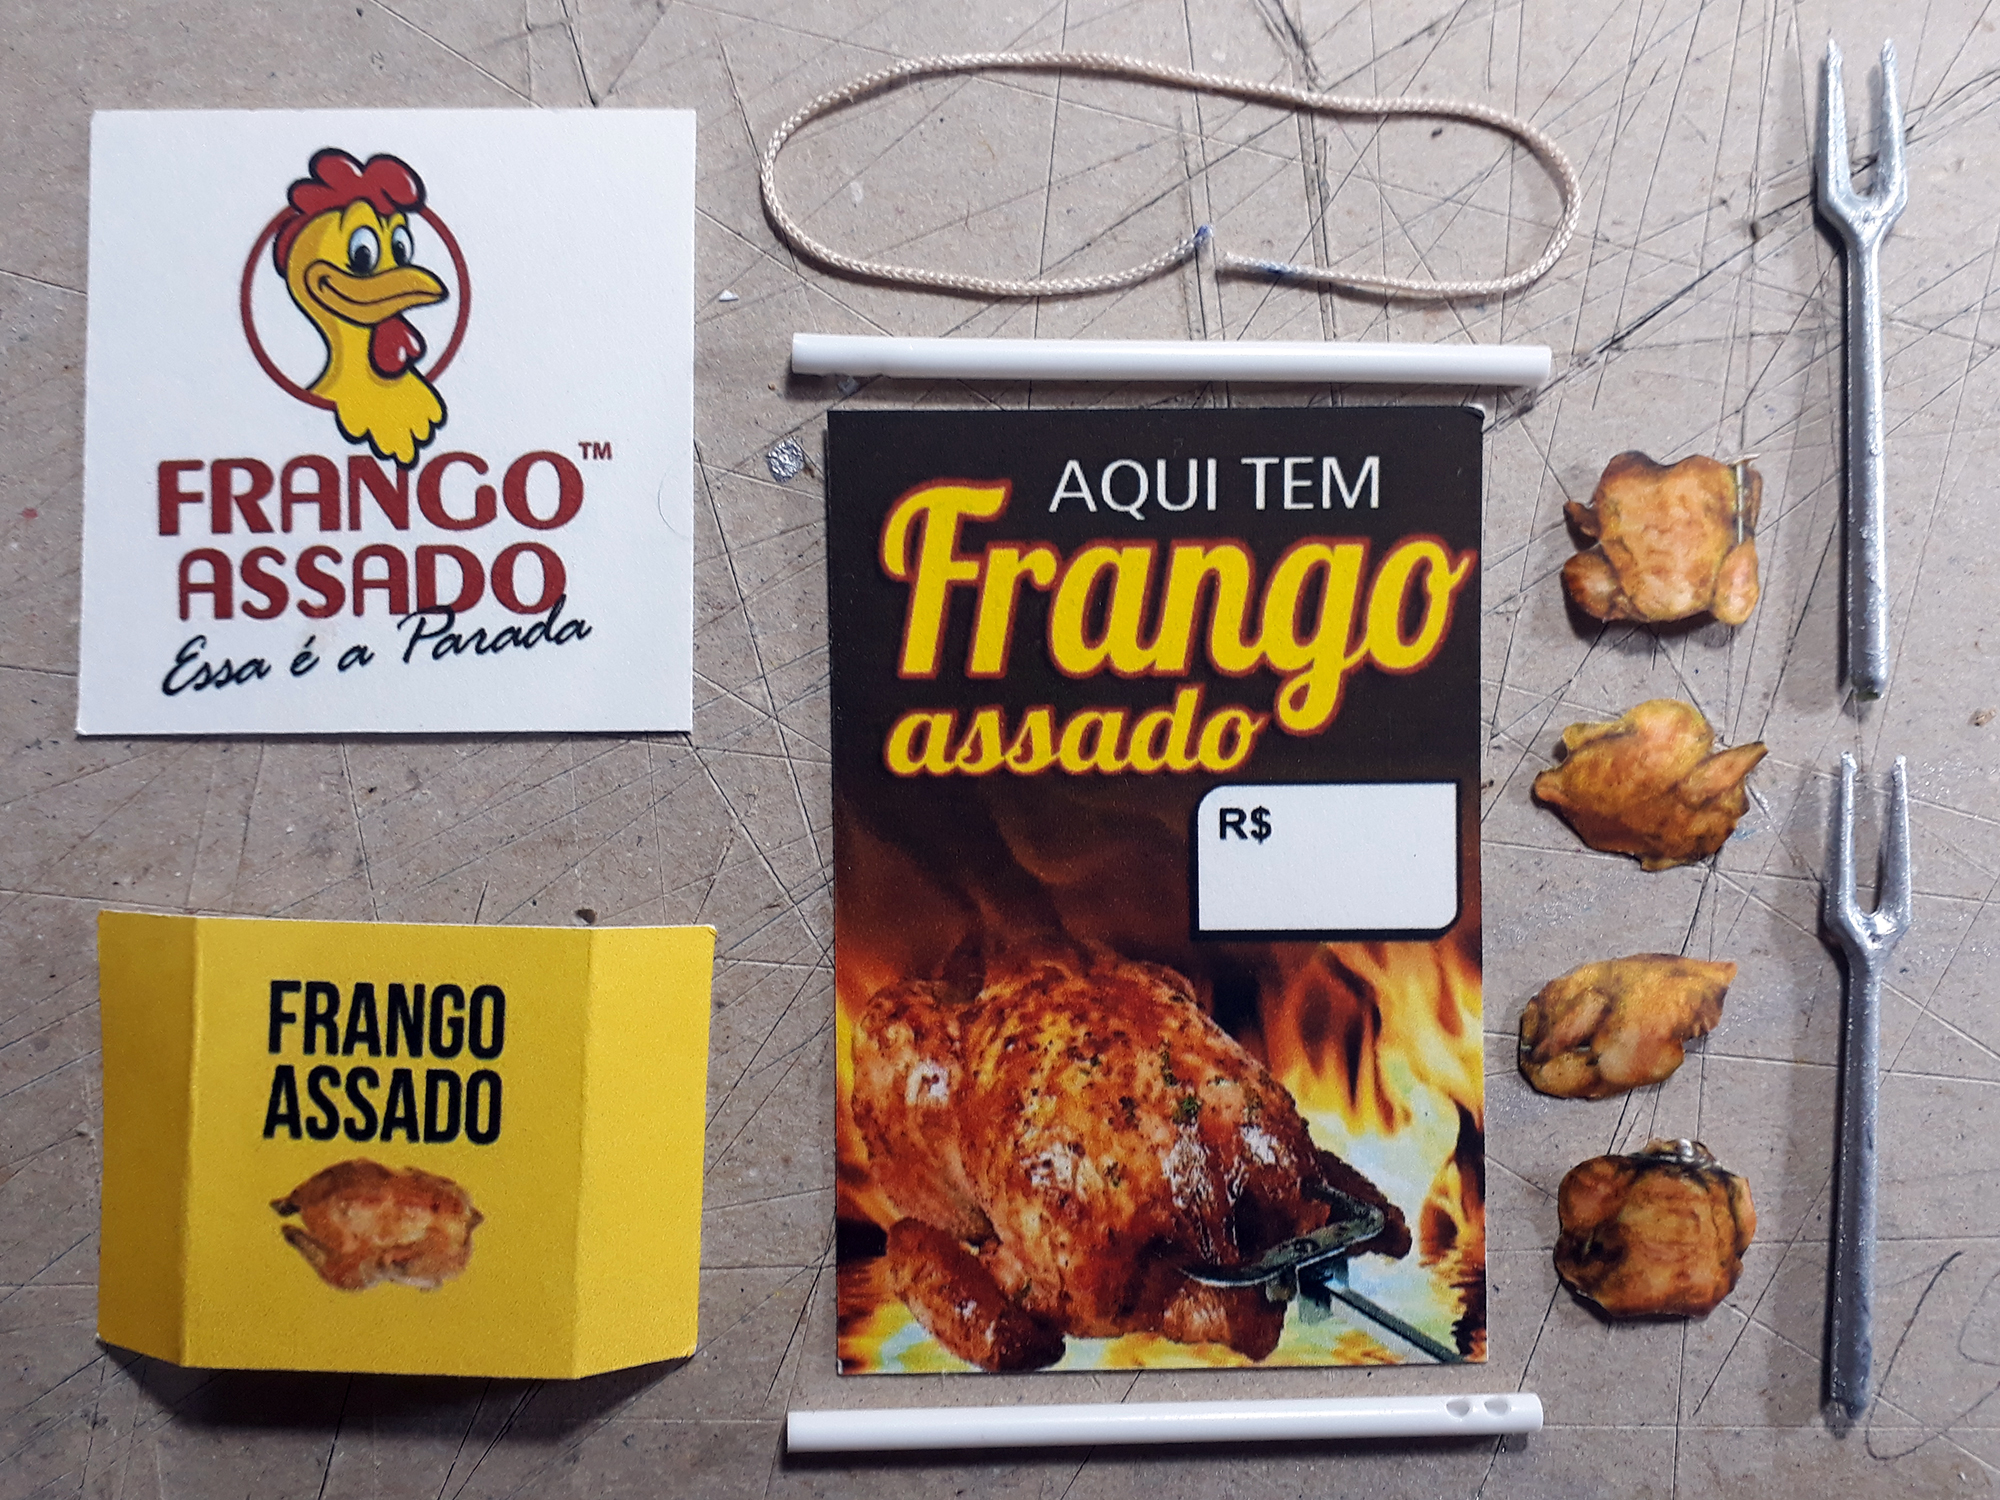
12) Agora vamos aos espetos de frango. Os espetos de churrasco foram medidos e pintados de prata. Para o cabo, enrolamos fita isolante até ficar na espessura desejada.
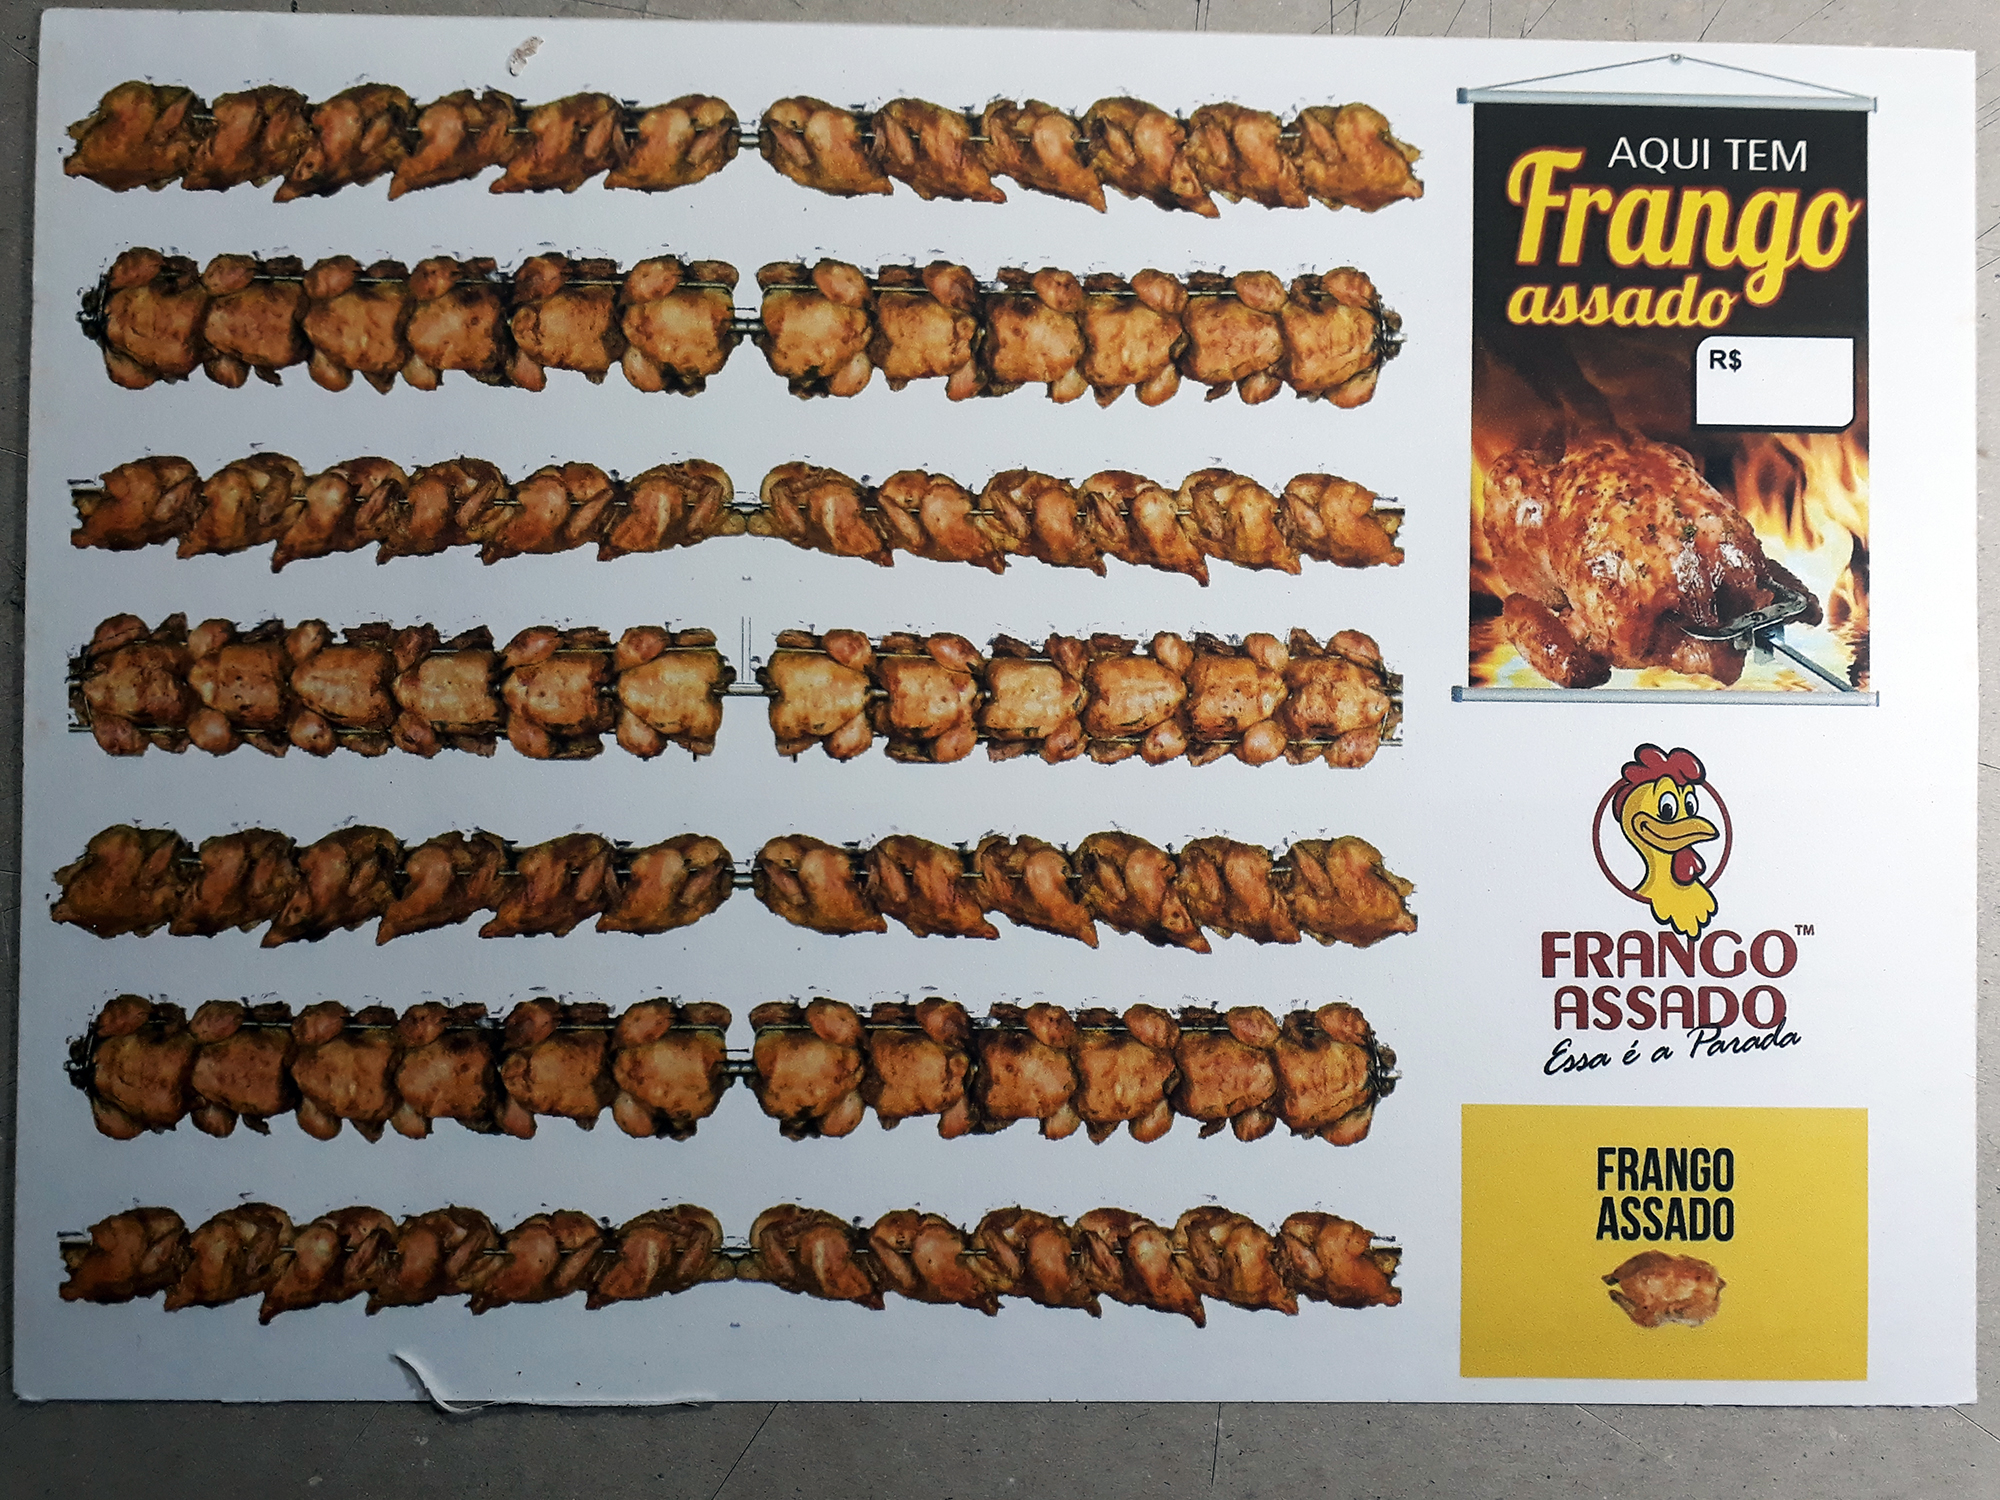
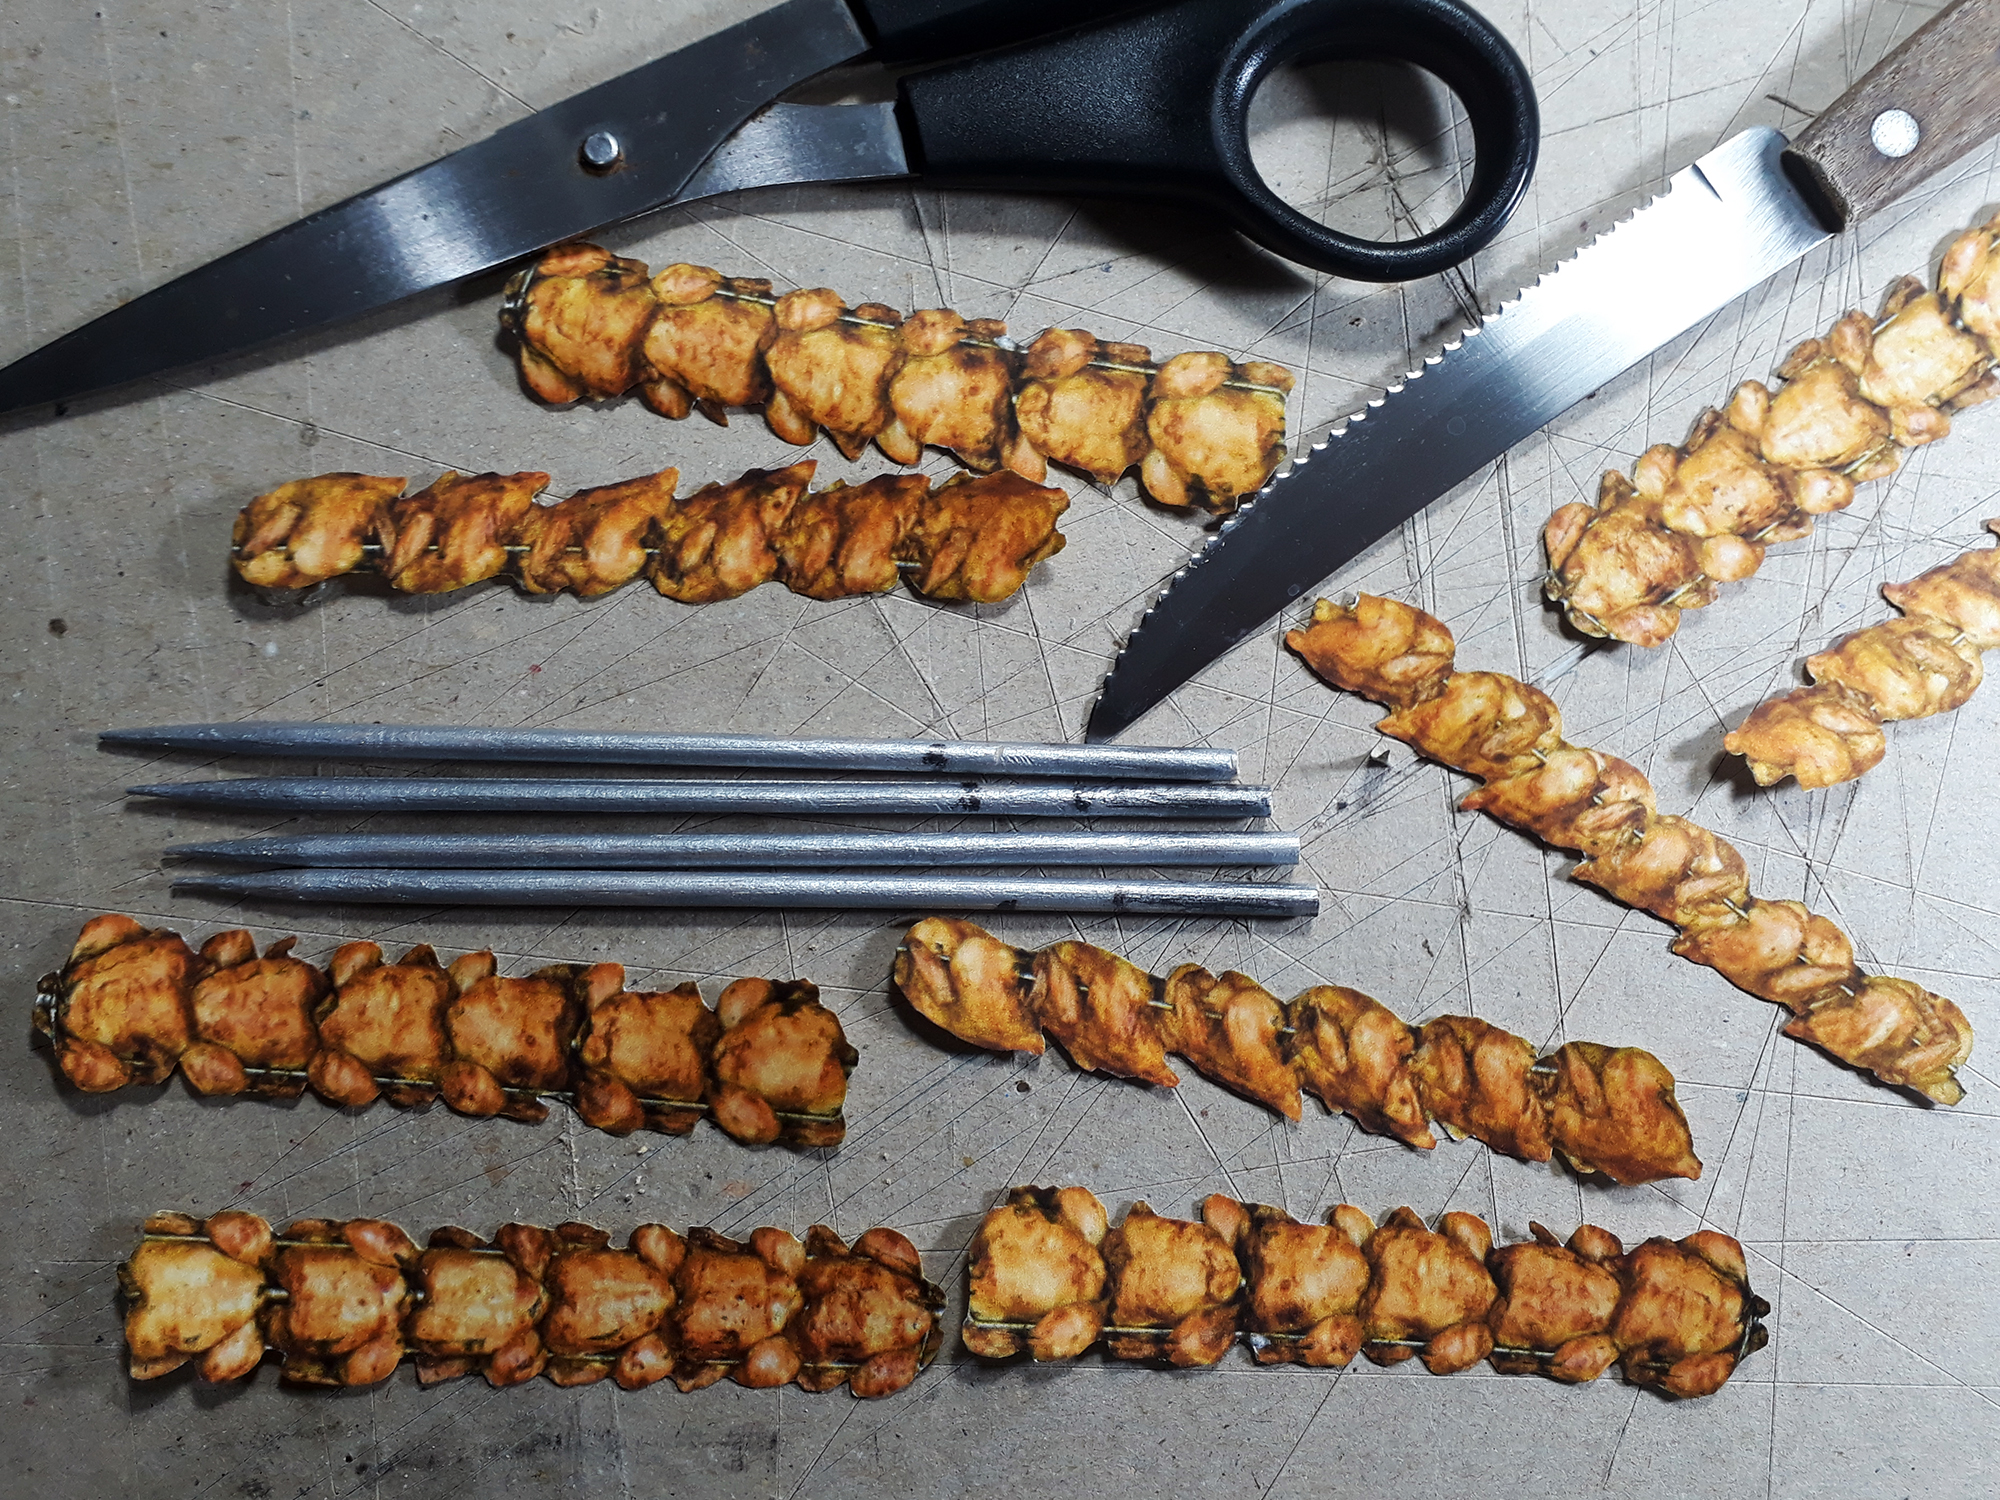
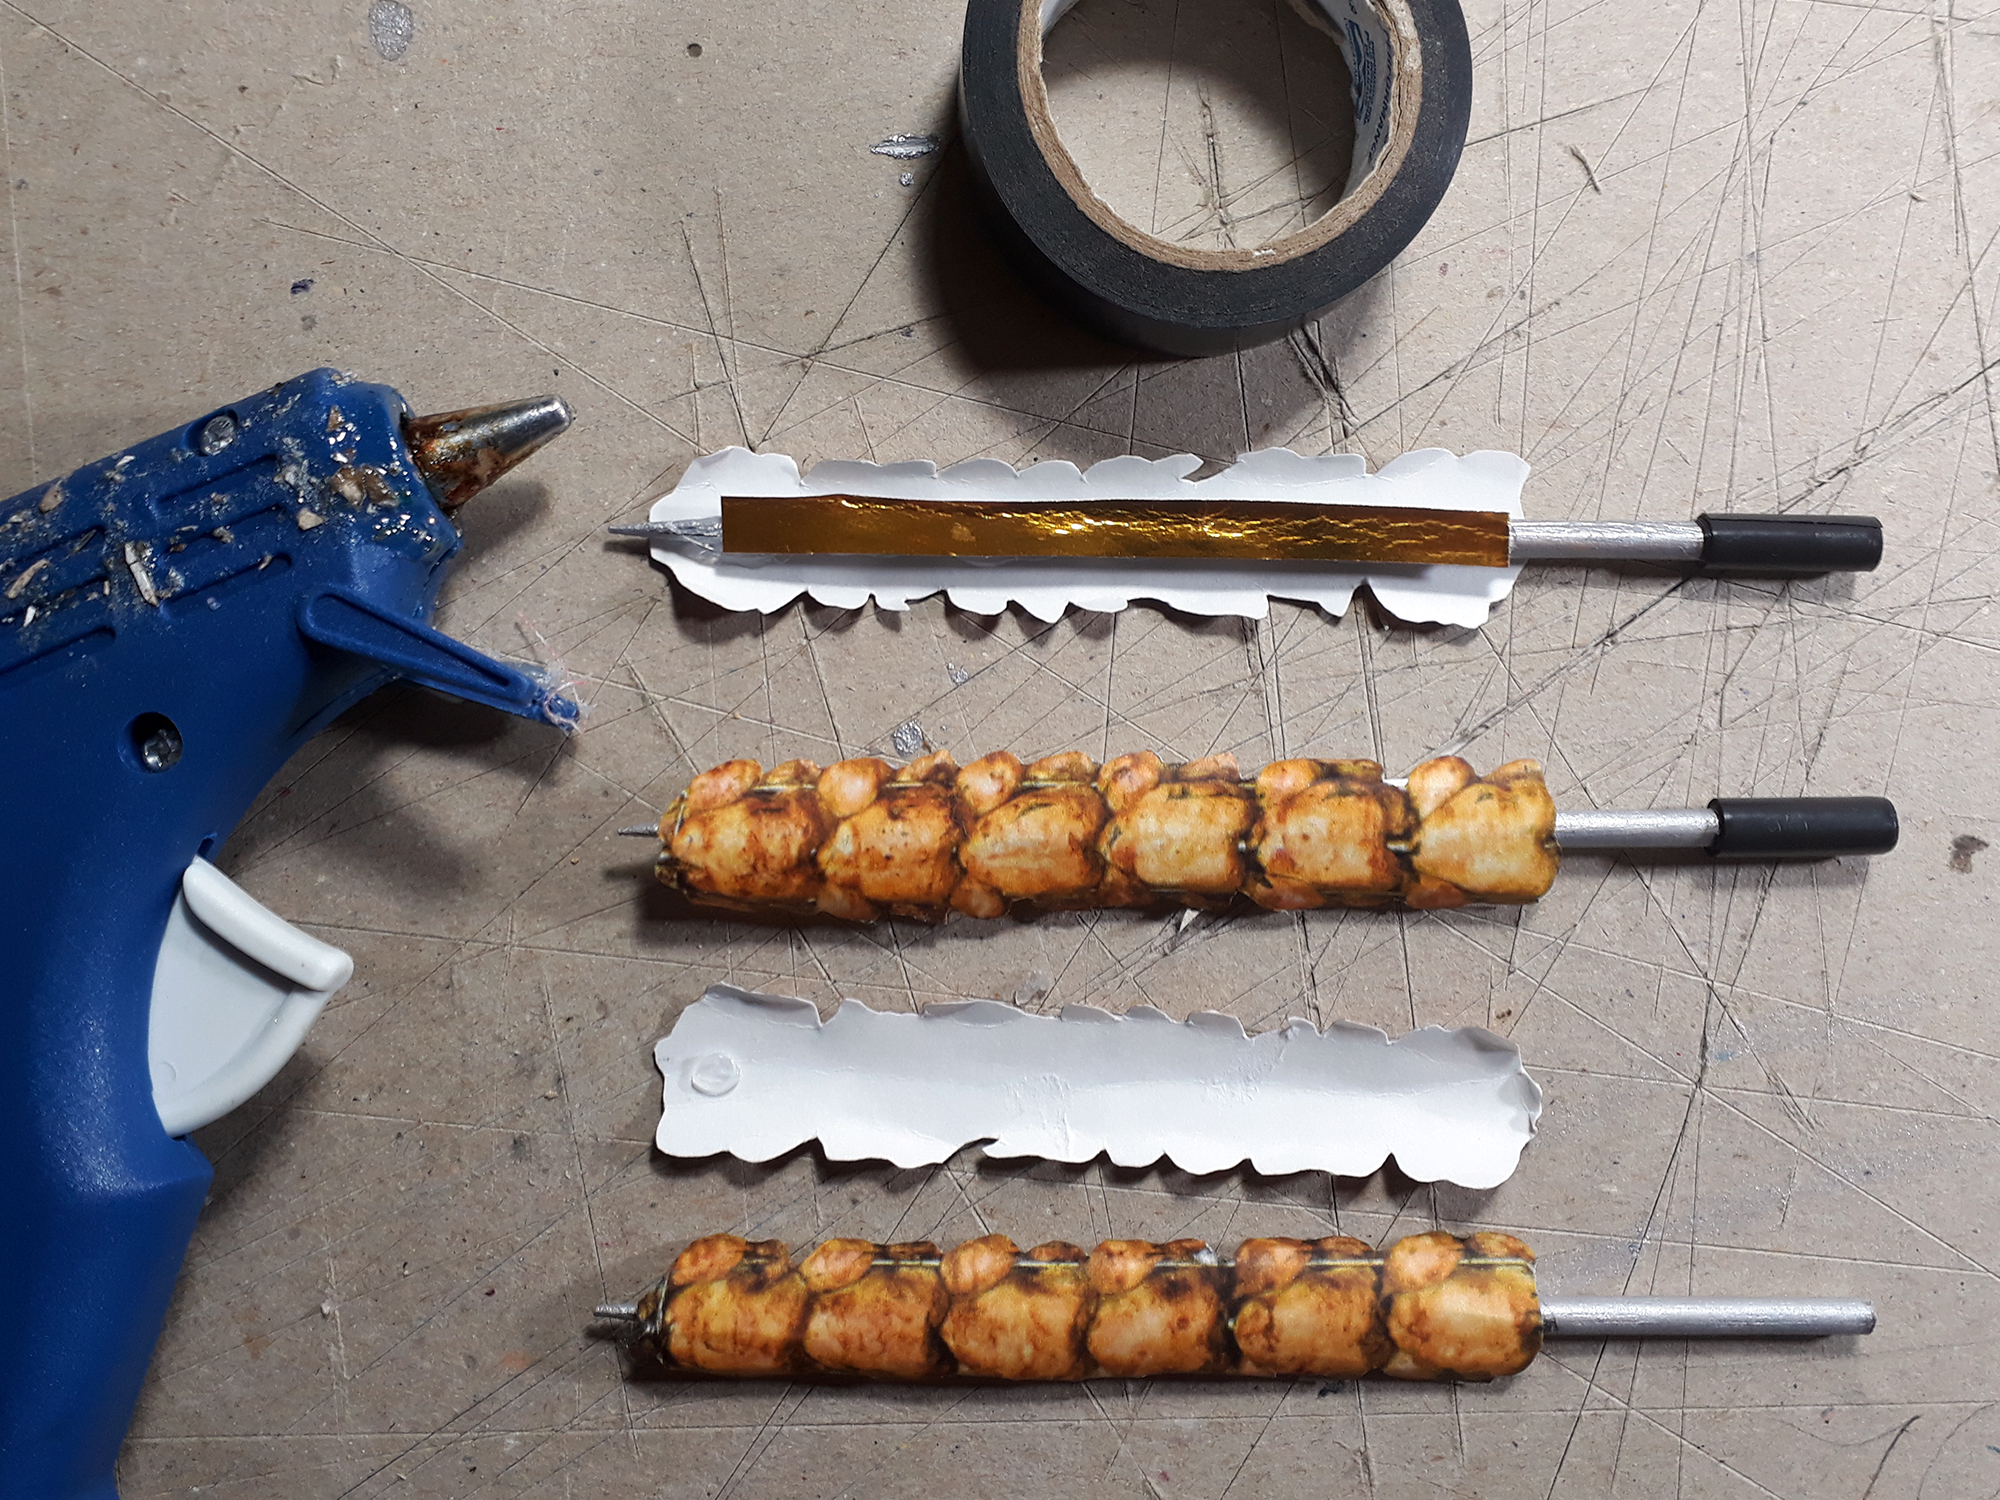
13) Hora do Frango! Achei na web algumas fotos de frangos assados e montei uma página para impressão. Recorte e cole no espeto. Para dar a ilusão de volume, dobre um pouco as bordas. Afinal, dizem que a terra é plana, mas frango assado eu sei que não é!
14) Finalizamos os acessórios com o galhardete feito estrutura de canudo de pirulito e barbante e alguns cartazes!

DIY – Chicken Roaster
Baba Baby project for the Beast Wars contest, which was canceled by Corona Virus! But I am sweet and went ahead with the construction of the Chicken Roaster! Another special project that took me 1 week between testing and finishing, but the result was really cool!
Want to build your Chicken Roaster? Follow the Tutorial to let any stray dog drooling in front of the dog tv!
You will need:
- Silver Laminated Cardboard
- Golden Laminated Cardboard
- Cardboard paper or featherboard for the structure
- Acetate sheet or resistant plastic
- Barbecue Skewers
- Silver craft paint
- Black electrical tape
- Plastic straw
- Magnets
- Metal plate
- Hot glue
- Super glue
1) Let’s start with the design of the project! After some tests I closed the size for the 1:12 scale at 11x16x3,5 (LAP). Planning on the metallized cardboard the structure already thinking about the closings and the showcase.
2) We add cardboard sheets to make the structure resistant. remember not to make exactly the size of the drawing because when you fold, you lose a few millimeters of internal area. The structure has to be firm enough not to create a “belly”. Again we make the frame for the showcase and glue a metallic cardboard bottom to the inside.
3) Now it’s time to cut and crease. check that the structure is closing correctly.
4) Before closing the box, we will make the markings for the axle and the skewer bays. Dividing the visible space of the showcase equally. In one of the bows we will cut the bays to fit and remove the skewers.
5) Close and glue the box and check that the skewer bays are aligned.
6) Now we are going to complete the internal floor and ceiling with cardboard. I also added two inner frame tabs at the top and bottom.
7) Now let’s heat up this oven with practical effects: The golden laminated cardboard covering the sides, bottom and ceiling will make the reflection of the light illuminate the oven!
8) For the skewers to stay in place without having to pierce the side of the oven, we will use small pieces of plastic straw to hold the tip of the skewer. Glue with hot glue to the shaft marking.
9) Time to close the window. Transparent acetate for glass. I used plastic from a packaging. Glue inside and make a new layer of silver cardboard to finish the showcase over the acetate
10) Now we need to close this oven. I created a flap on the door to be on the side, but this whole structure ends up not closing properly. the solution: magnets!
11) Let’s put 3 magnets on the side and a metal plate on the lid flap and that’s it! Magnetic lock!
Tip from Guguinha!
Want to use magnets in your projects but can’t go out and buy? Your problems are over: use EARPHONES! Yes, you heard me right! Every sound device has magnets. from the big boxes to the headphones. Just open the structure, which has a small and powerful magnet inside! And considering the amount of headphones that spoil, we have a virtually infinite stock of magnets!
12) Now let’s go to the chicken skewers. The barbecue skewers were measured and painted silver. For the cable, we wrap electrical tape until it reaches the desired thickness.
13) Chicken time! I found some pictures of roasted chicken on the web and set up a page for printing. Cut and paste on the skewer. To give the illusion of volume, slightly bend the edges. After all, they say the land is flat, but roast chicken I know it isn’t!
14) We finished the accessories with the pennant made of a straw and string structure and some posters!
Facebook: www.facebook.com/turmadoguguinha/
Instagram: www.instagram.com/turmadoguguinha/
roastchicken #ChickenRoaster #frangoassado #diorama #dioramacreators #toypics #toypic #toyphoto #toyphotography #topToyPhotos #epictoyart #toyunion #toygroup_alliance #fca #ACBA #cafainsta #cafadolls #headcafa #bzdc_br #toypic_community #toypiccommunity #toygroupbrasil #esferatoy #turmadoguguinha